Meta Conversion API Gateway enables server-side tracking for your Meta (Facebook) Pixel, improving data quality and ad performance. This guide shows you how to set it up through Hardal.
What is Meta Conversion API Gateway?
Meta Conversion API Gateway allows you to send events directly from your server to Meta, bypassing browser limitations. Benefits include:
- Improved Data Quality: Bypass ad blockers and browser restrictions
- Better Attribution: More accurate conversion tracking
- iOS 14.5+ Support: Enhanced tracking on iOS devices
- Reduced Data Loss: Server-to-server connection ensures reliable data transfer
Prerequisites
Before starting, ensure you have:
- Active Hardal account with a configured signal
- Meta Business Manager account
- Facebook Pixel installed on your website
- Admin access to your Meta Ads account
Step 1: Access Server-Side Hosts
Navigate to your Hardal dashboard and select your signal. Click Server Side Hosts in the left menu.
Locate the Meta Conversion API section.
Step 2: Provide Your Email
In the Meta Conversion API section:
- Enter your email address
- Click Deploy
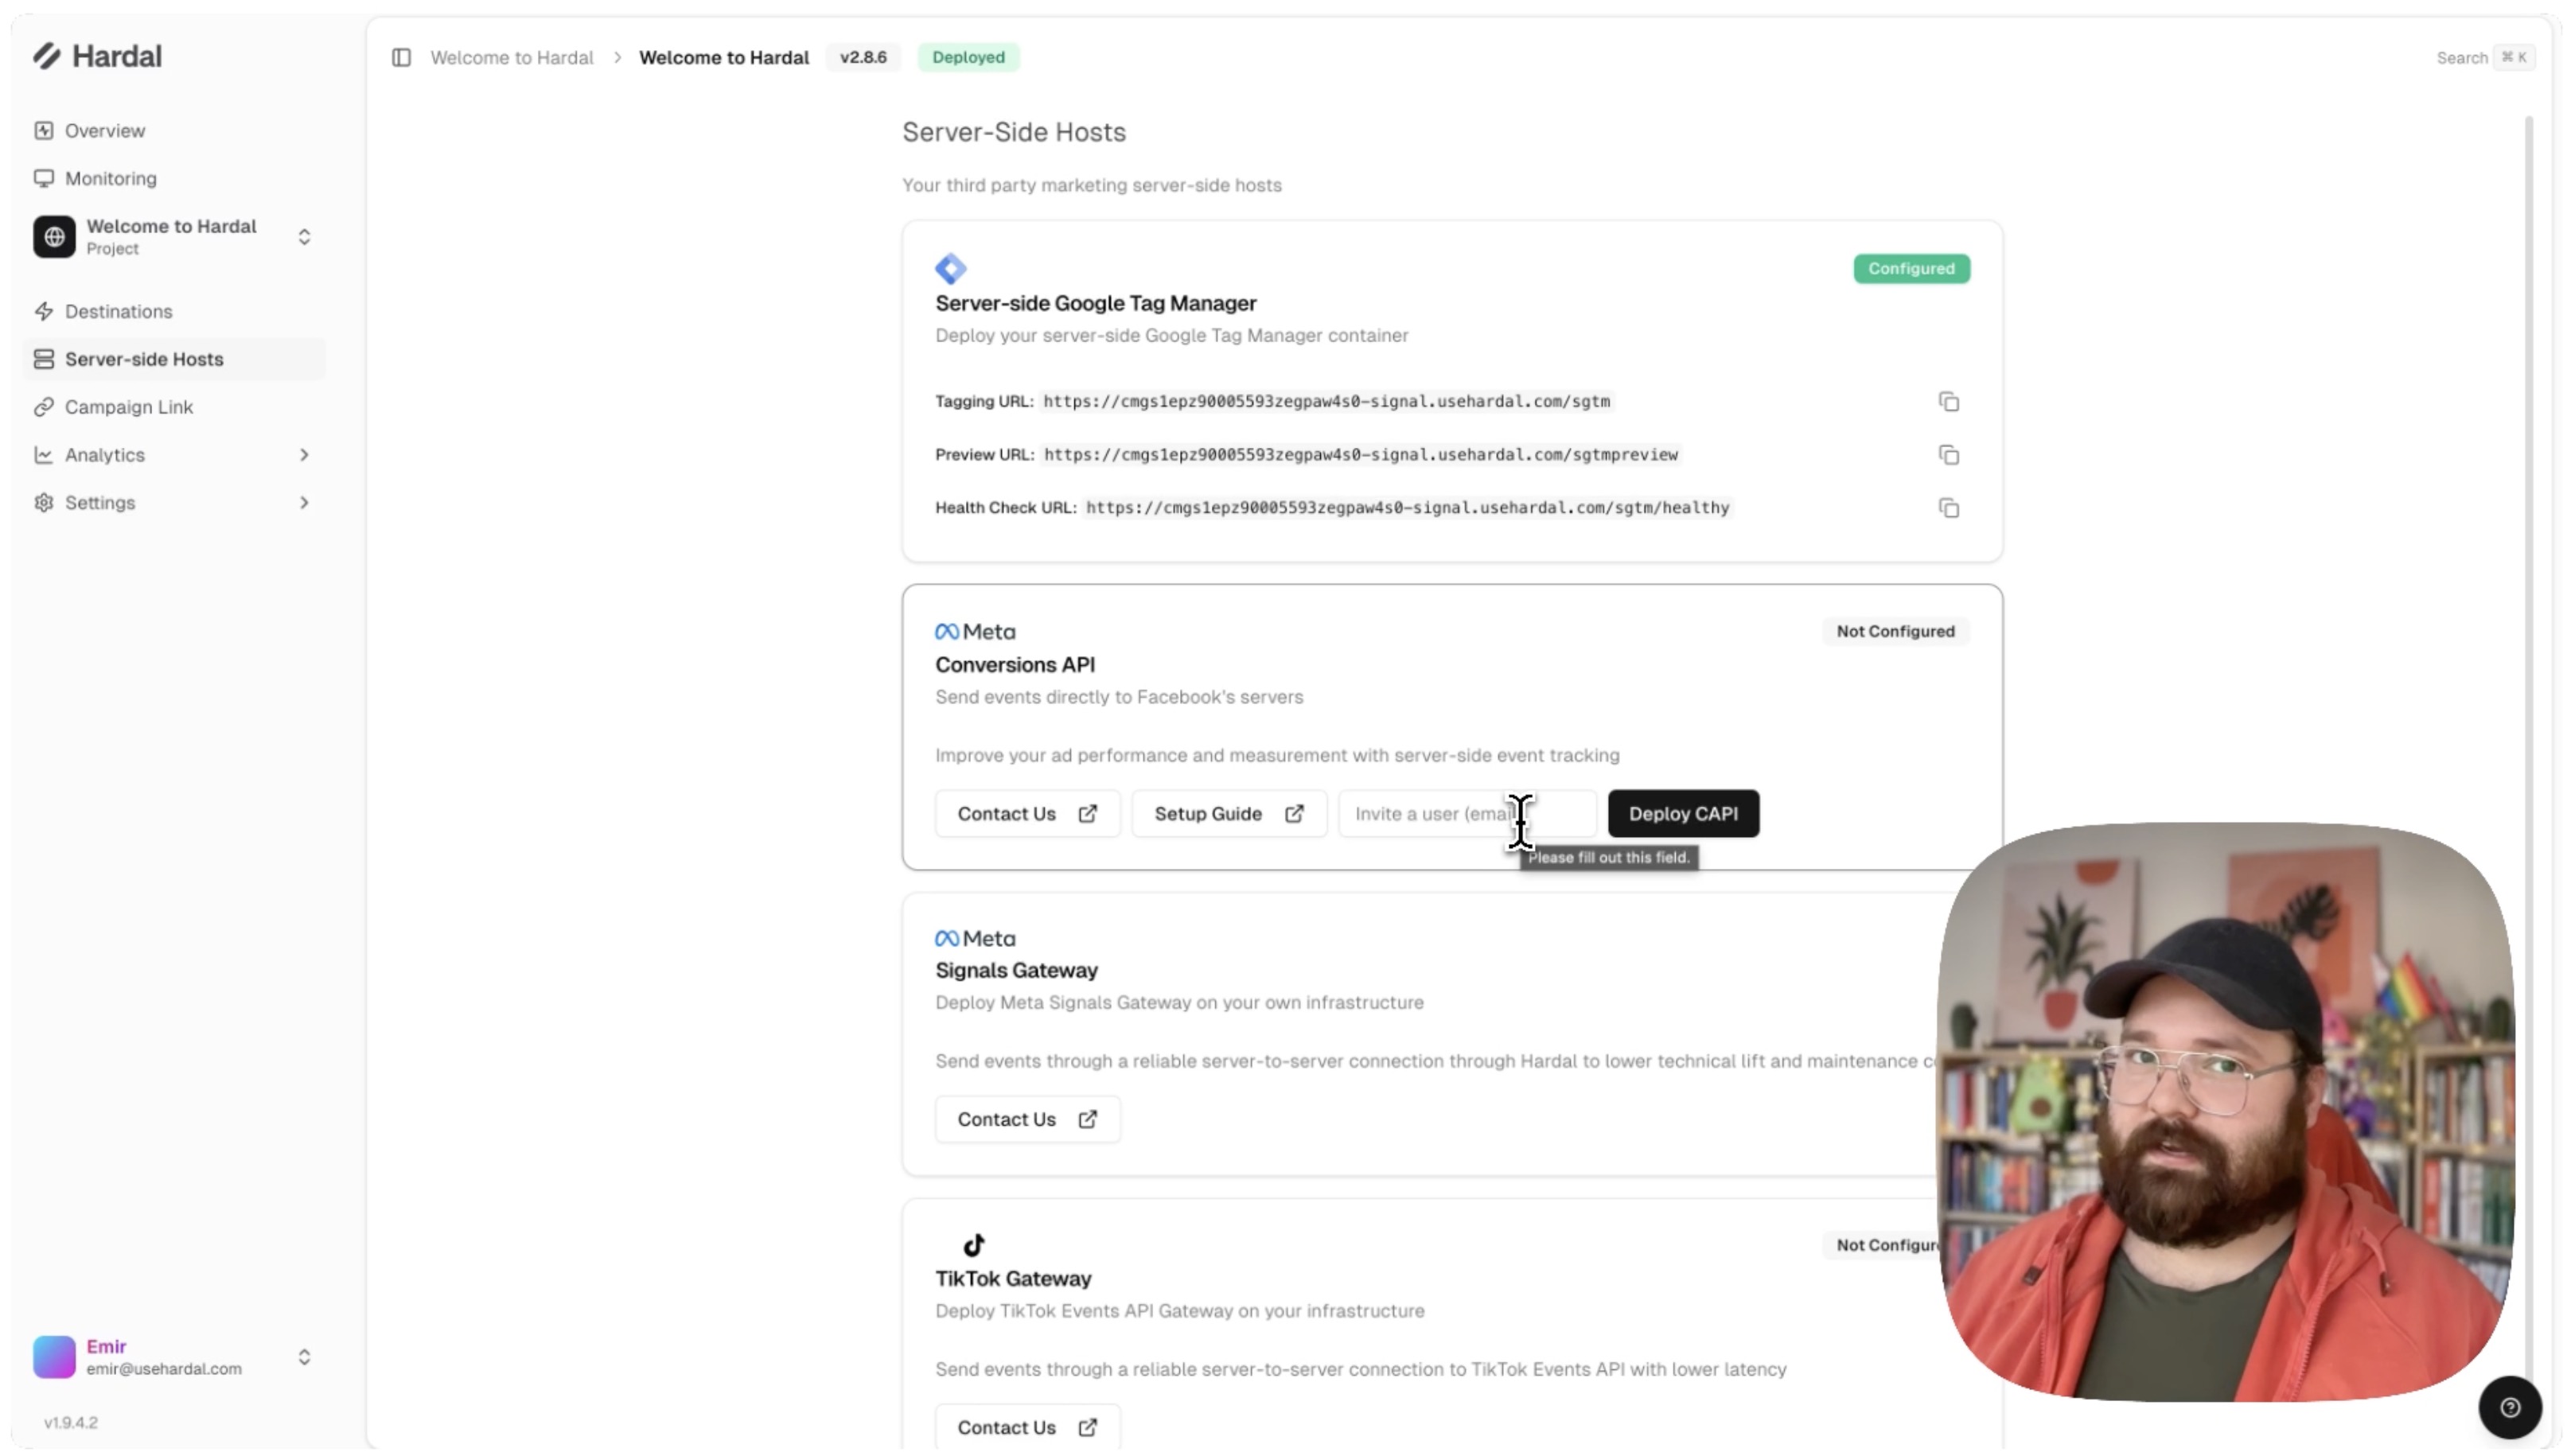
This email will receive an invitation to access the Meta Signals Gateway dashboard.
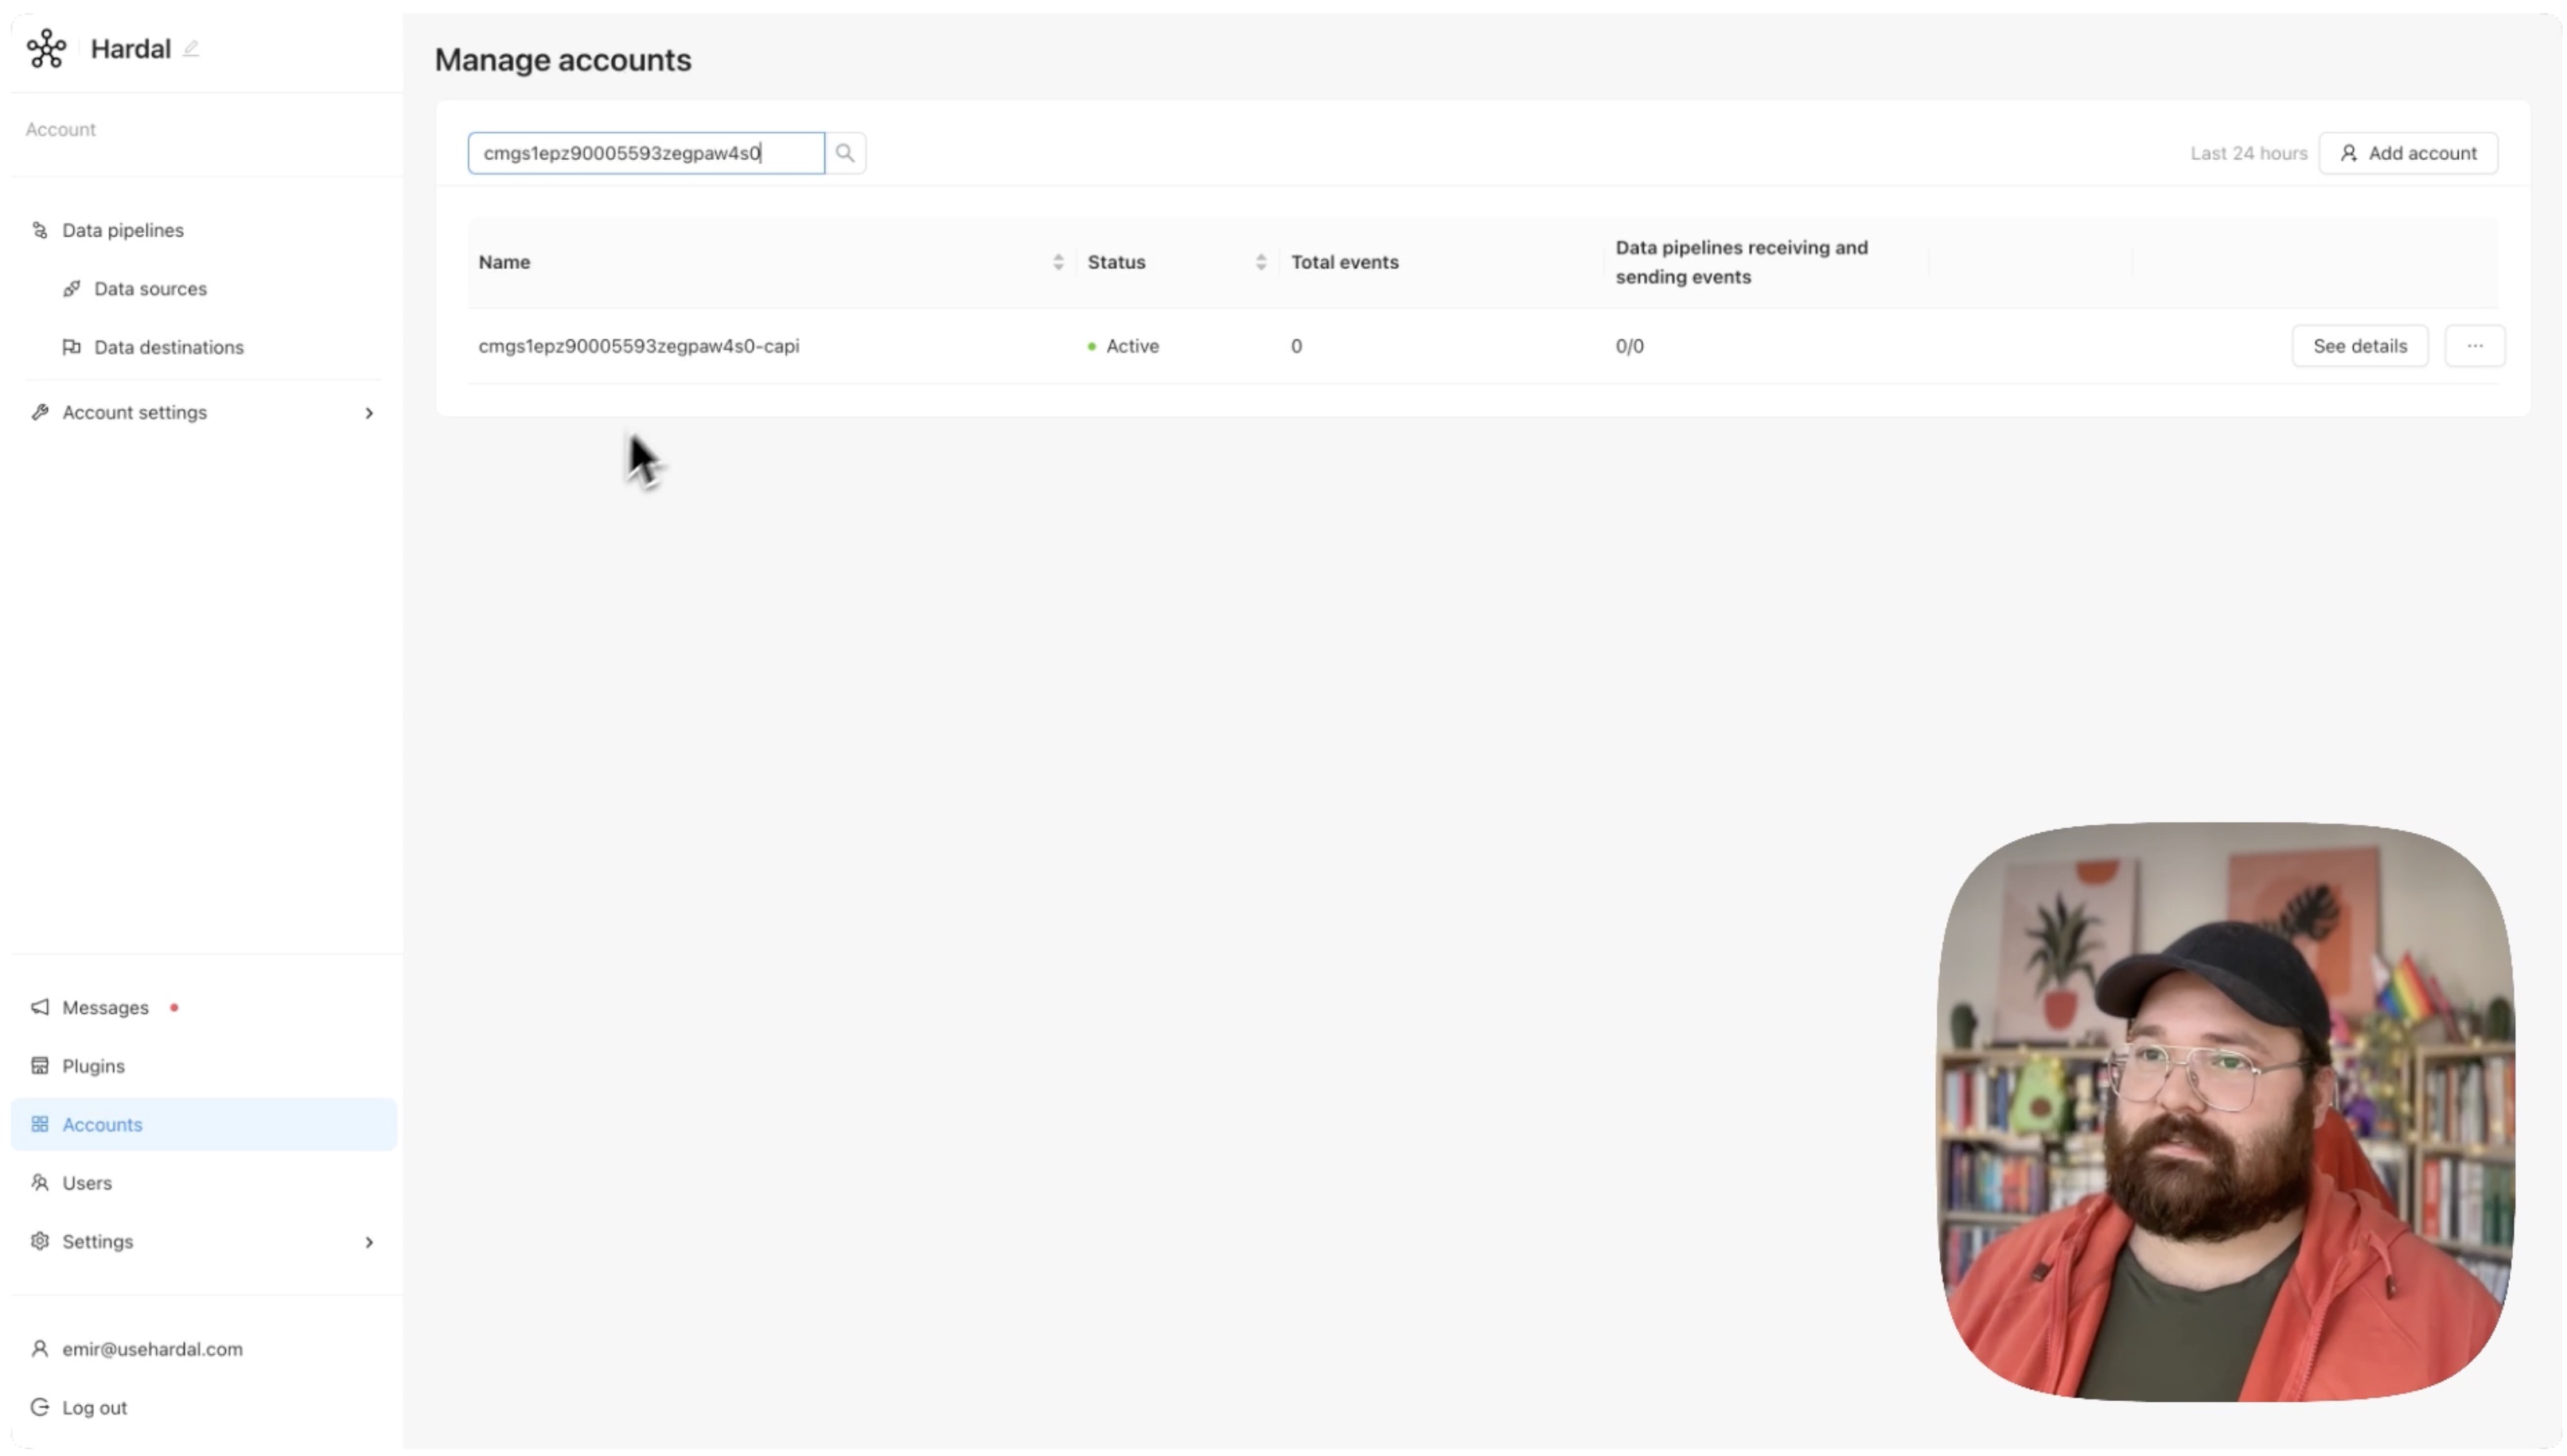
Step 3: Access Gateway Dashboard
Check your email for the invitation from Meta. Click the link to access the Signals Gateway dashboard.
In the dashboard, you'll see your Hardal Signal ID displayed. Click See Details to begin the installation process.
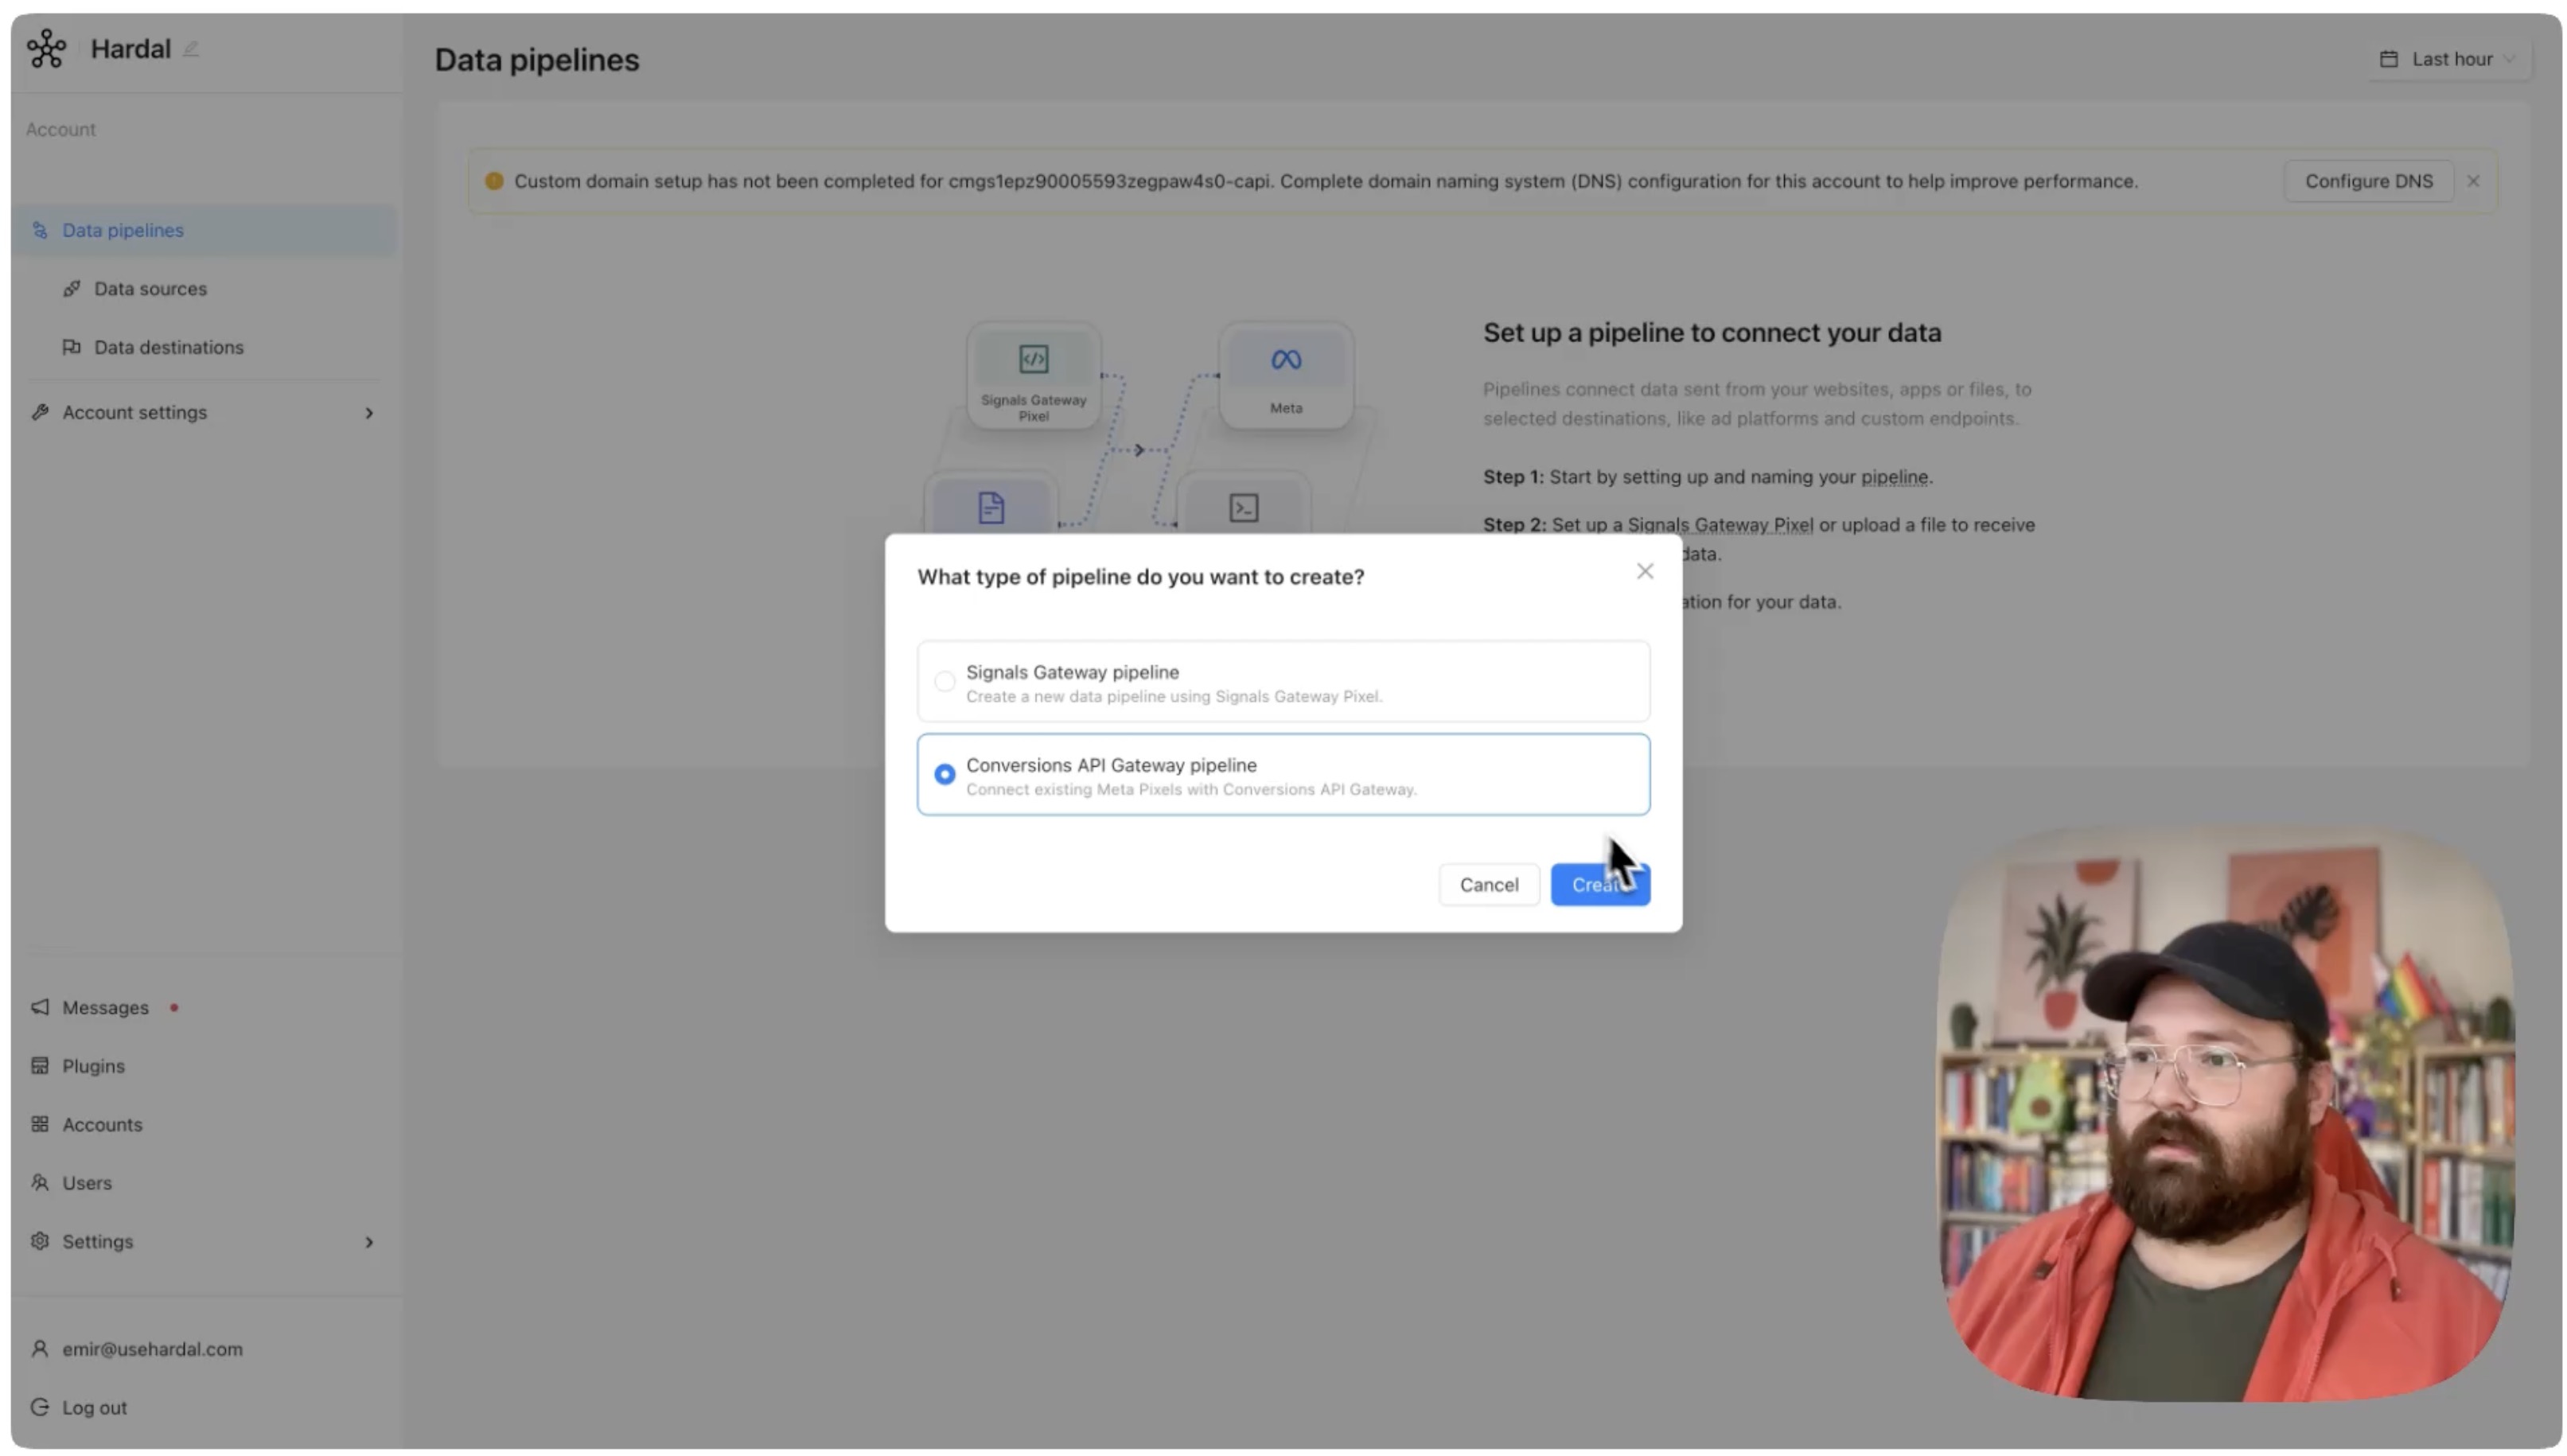
Step 4: Create Conversion API Pipeline
Click Get Started and then select Conversion API Pipeline. Click Create to begin configuration.
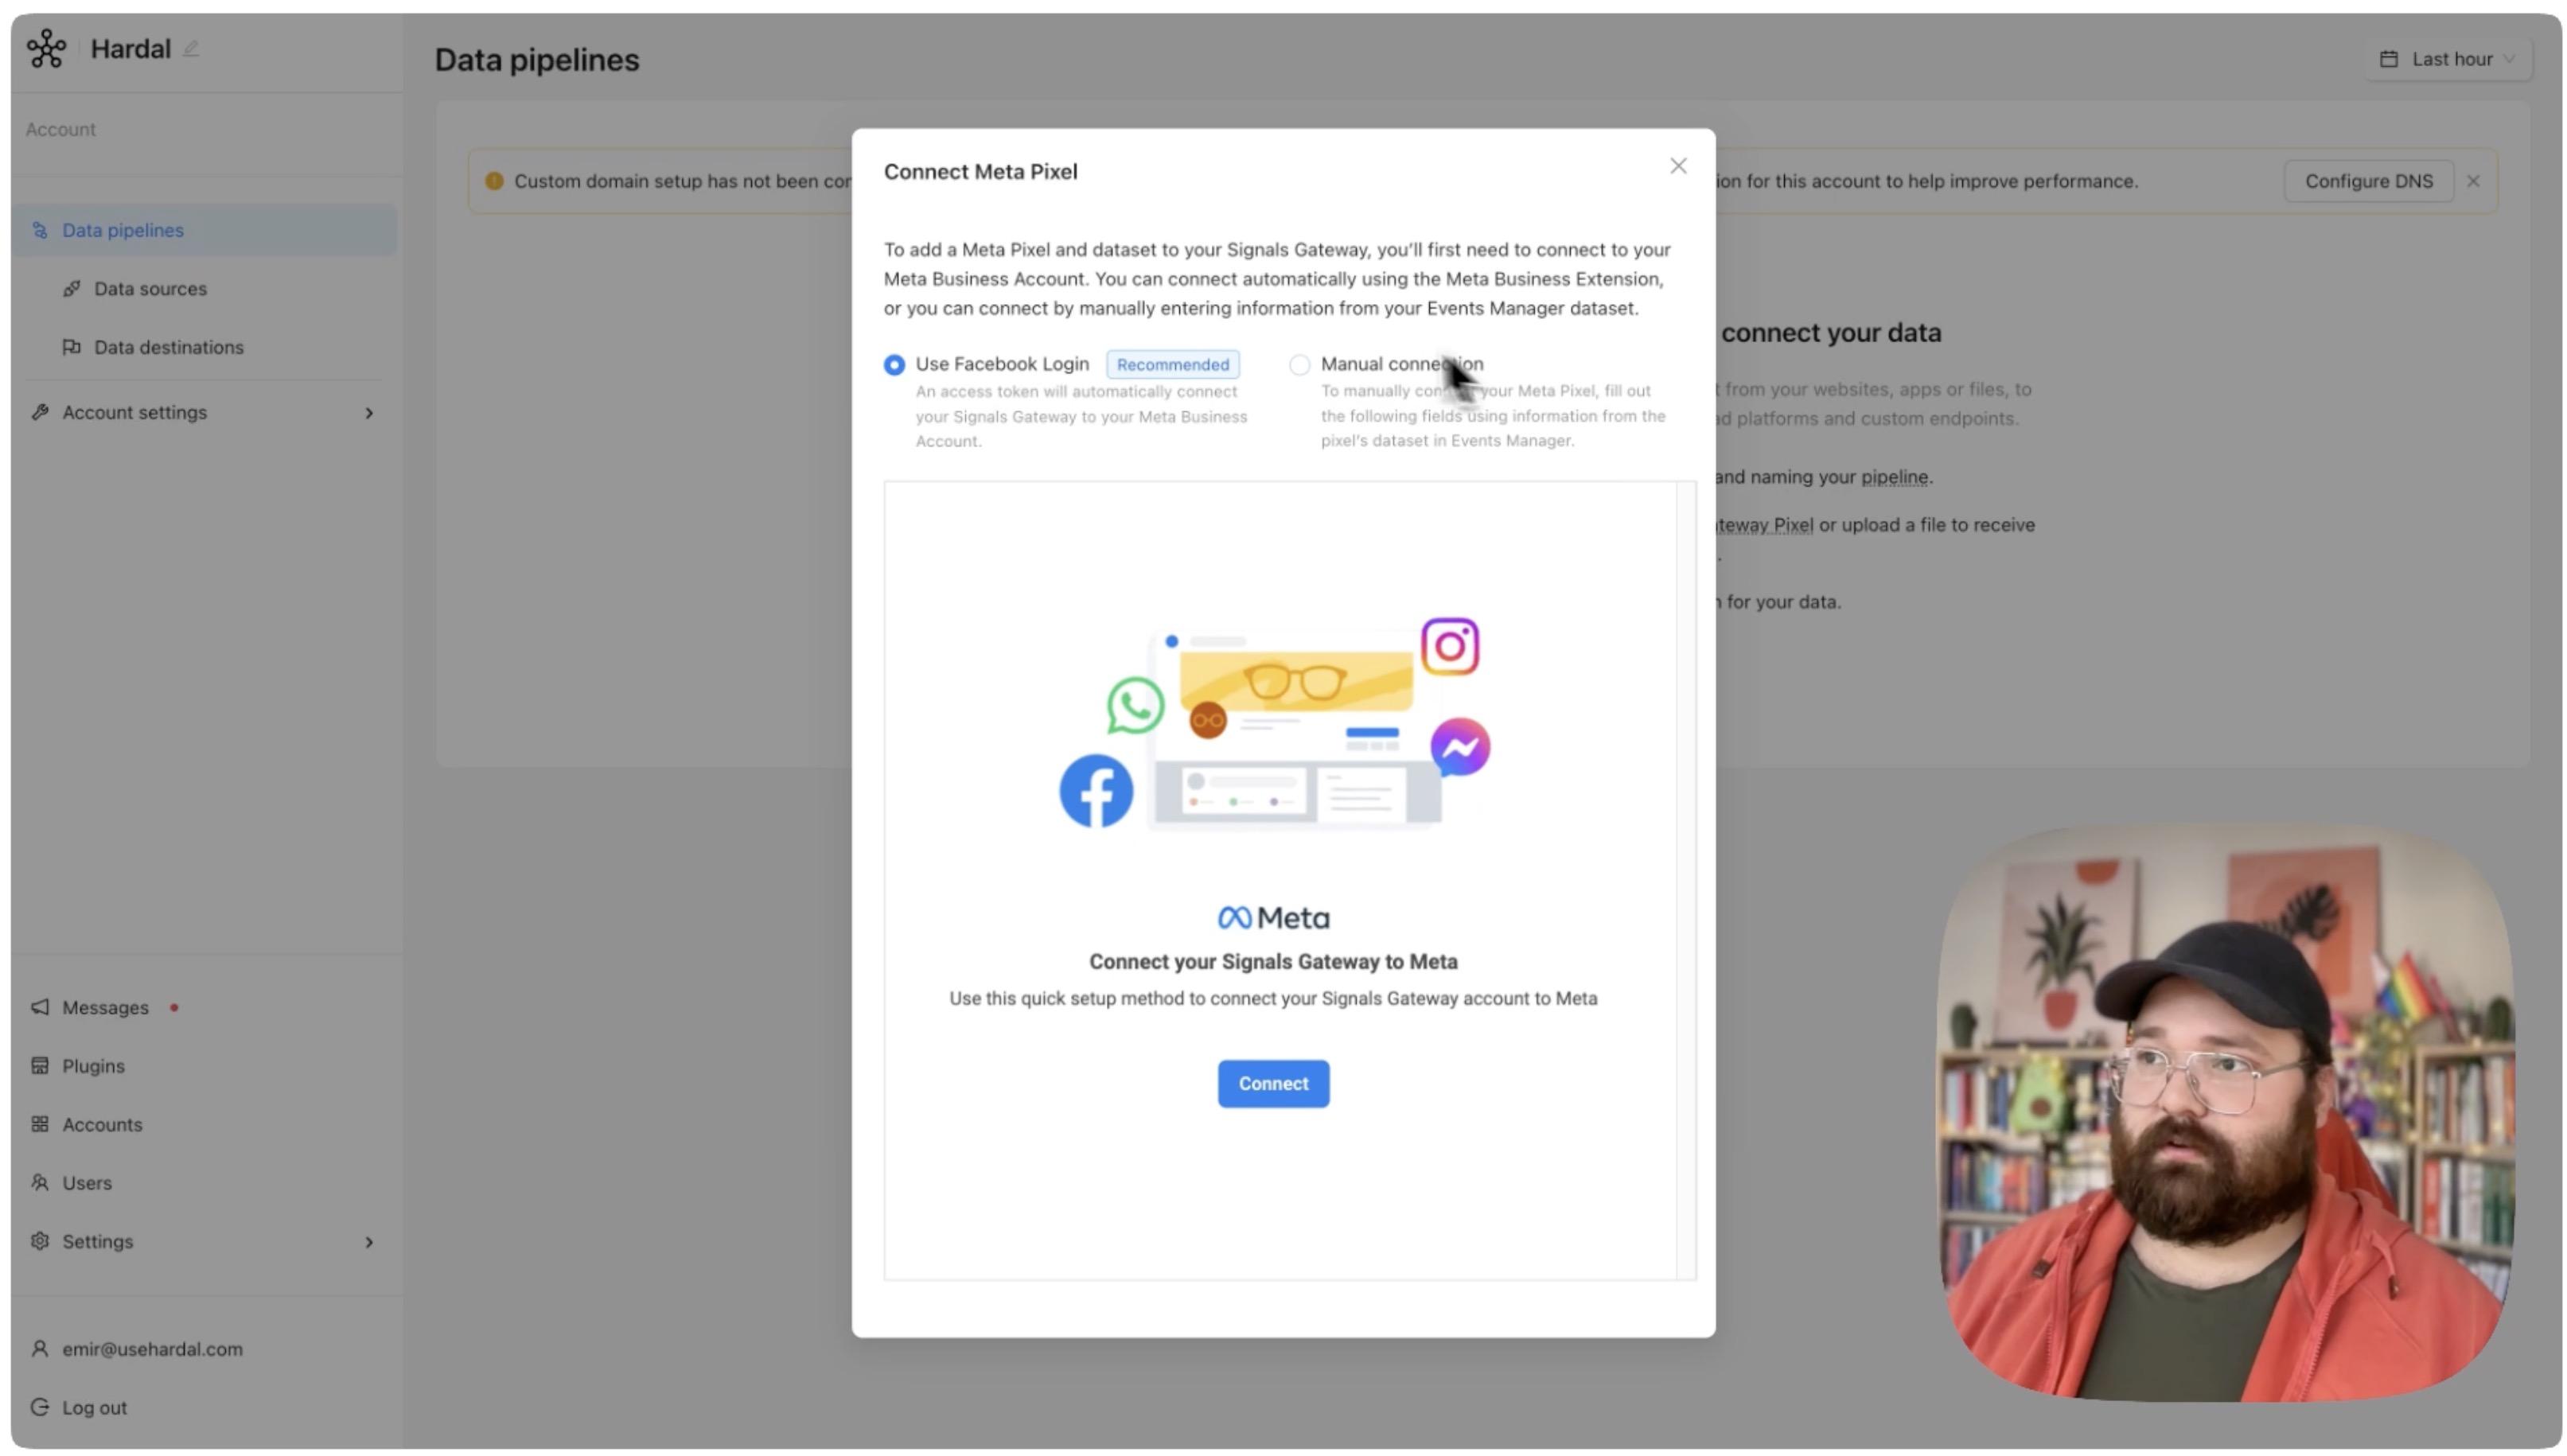
Step 5: Choose Connection Method
You have two options for connecting your Meta account:
Option 1: Facebook Login (Recommended)
- Click Connect with Facebook Login
- Authorize the application
- Select your Meta Business account
- Choose your pixel
This method automatically configures all required settings.
Option 2: Manual Connection
If you prefer manual setup, you'll need to provide:
- Meta Business ID
- Dataset ID (Pixel ID)
- Access Token
Finding Your Manual Credentials
To find these values:
- Go to Meta Business Manager
- Navigate to Events Manager
- Select your pixel
- Go to Settings
- Find your Dataset ID under Pixel Details
- Generate an Access Token under Conversions API section
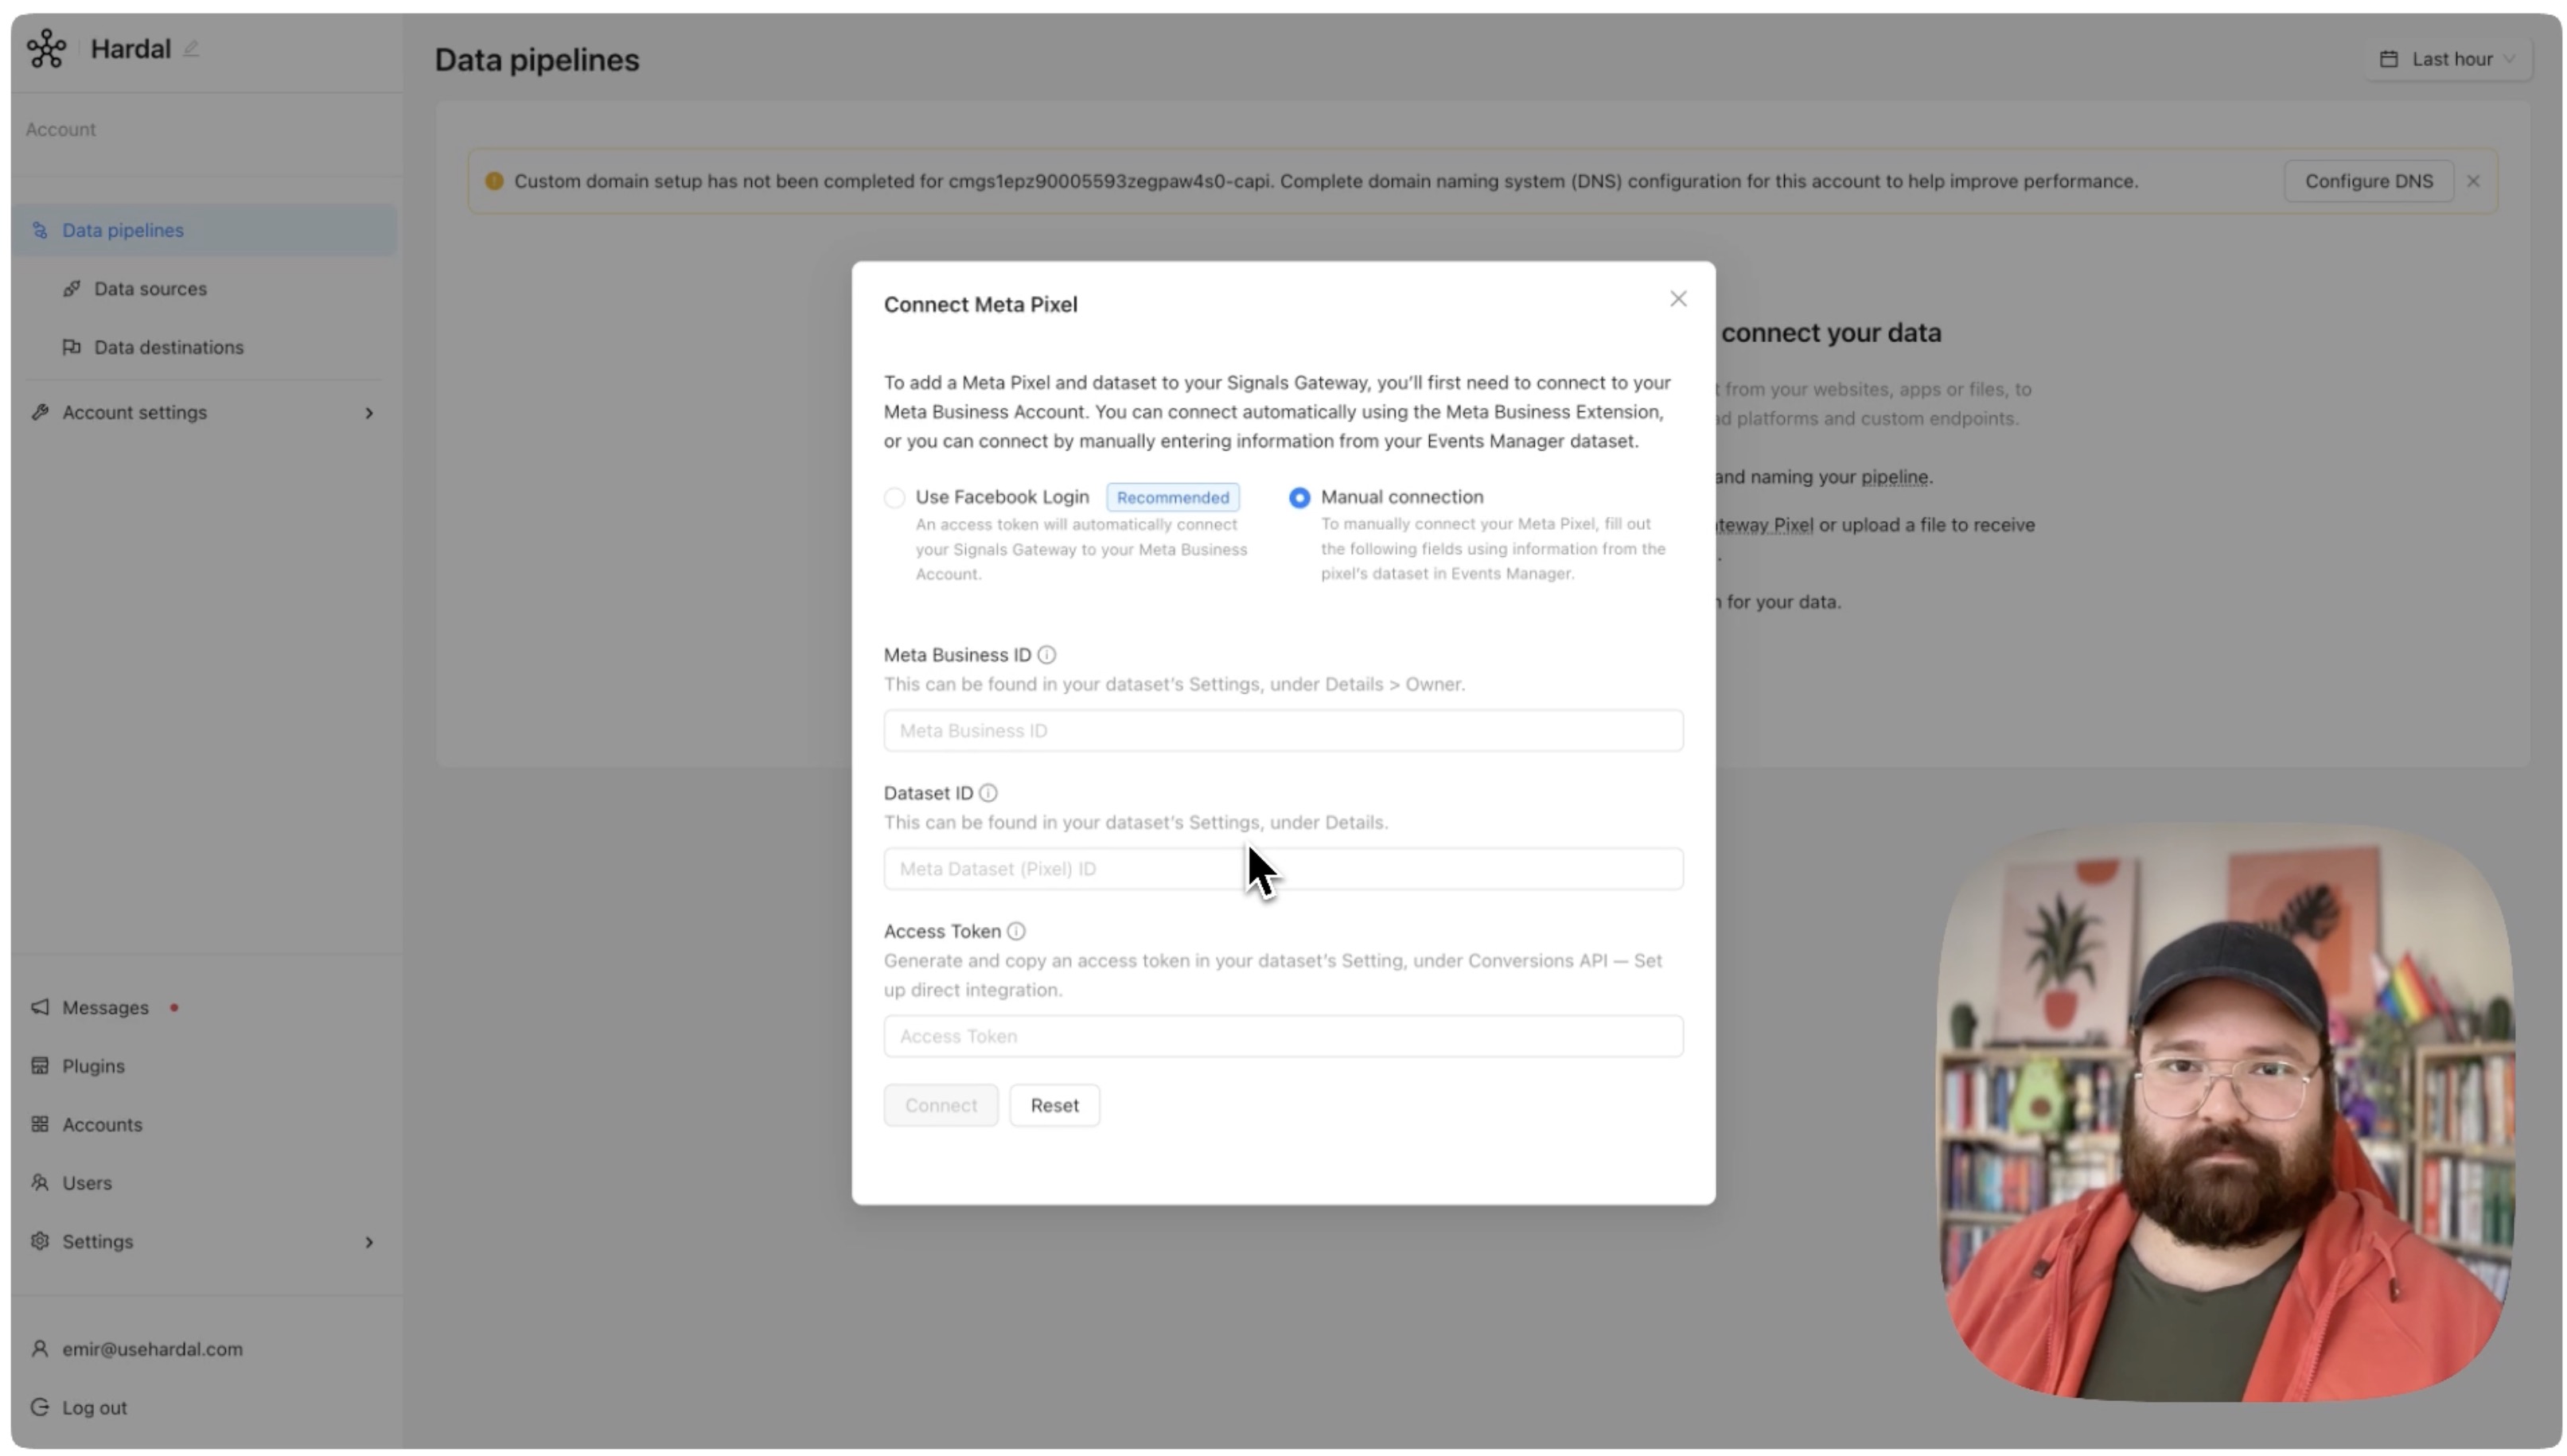
After providing all information, click Create to establish the connection.
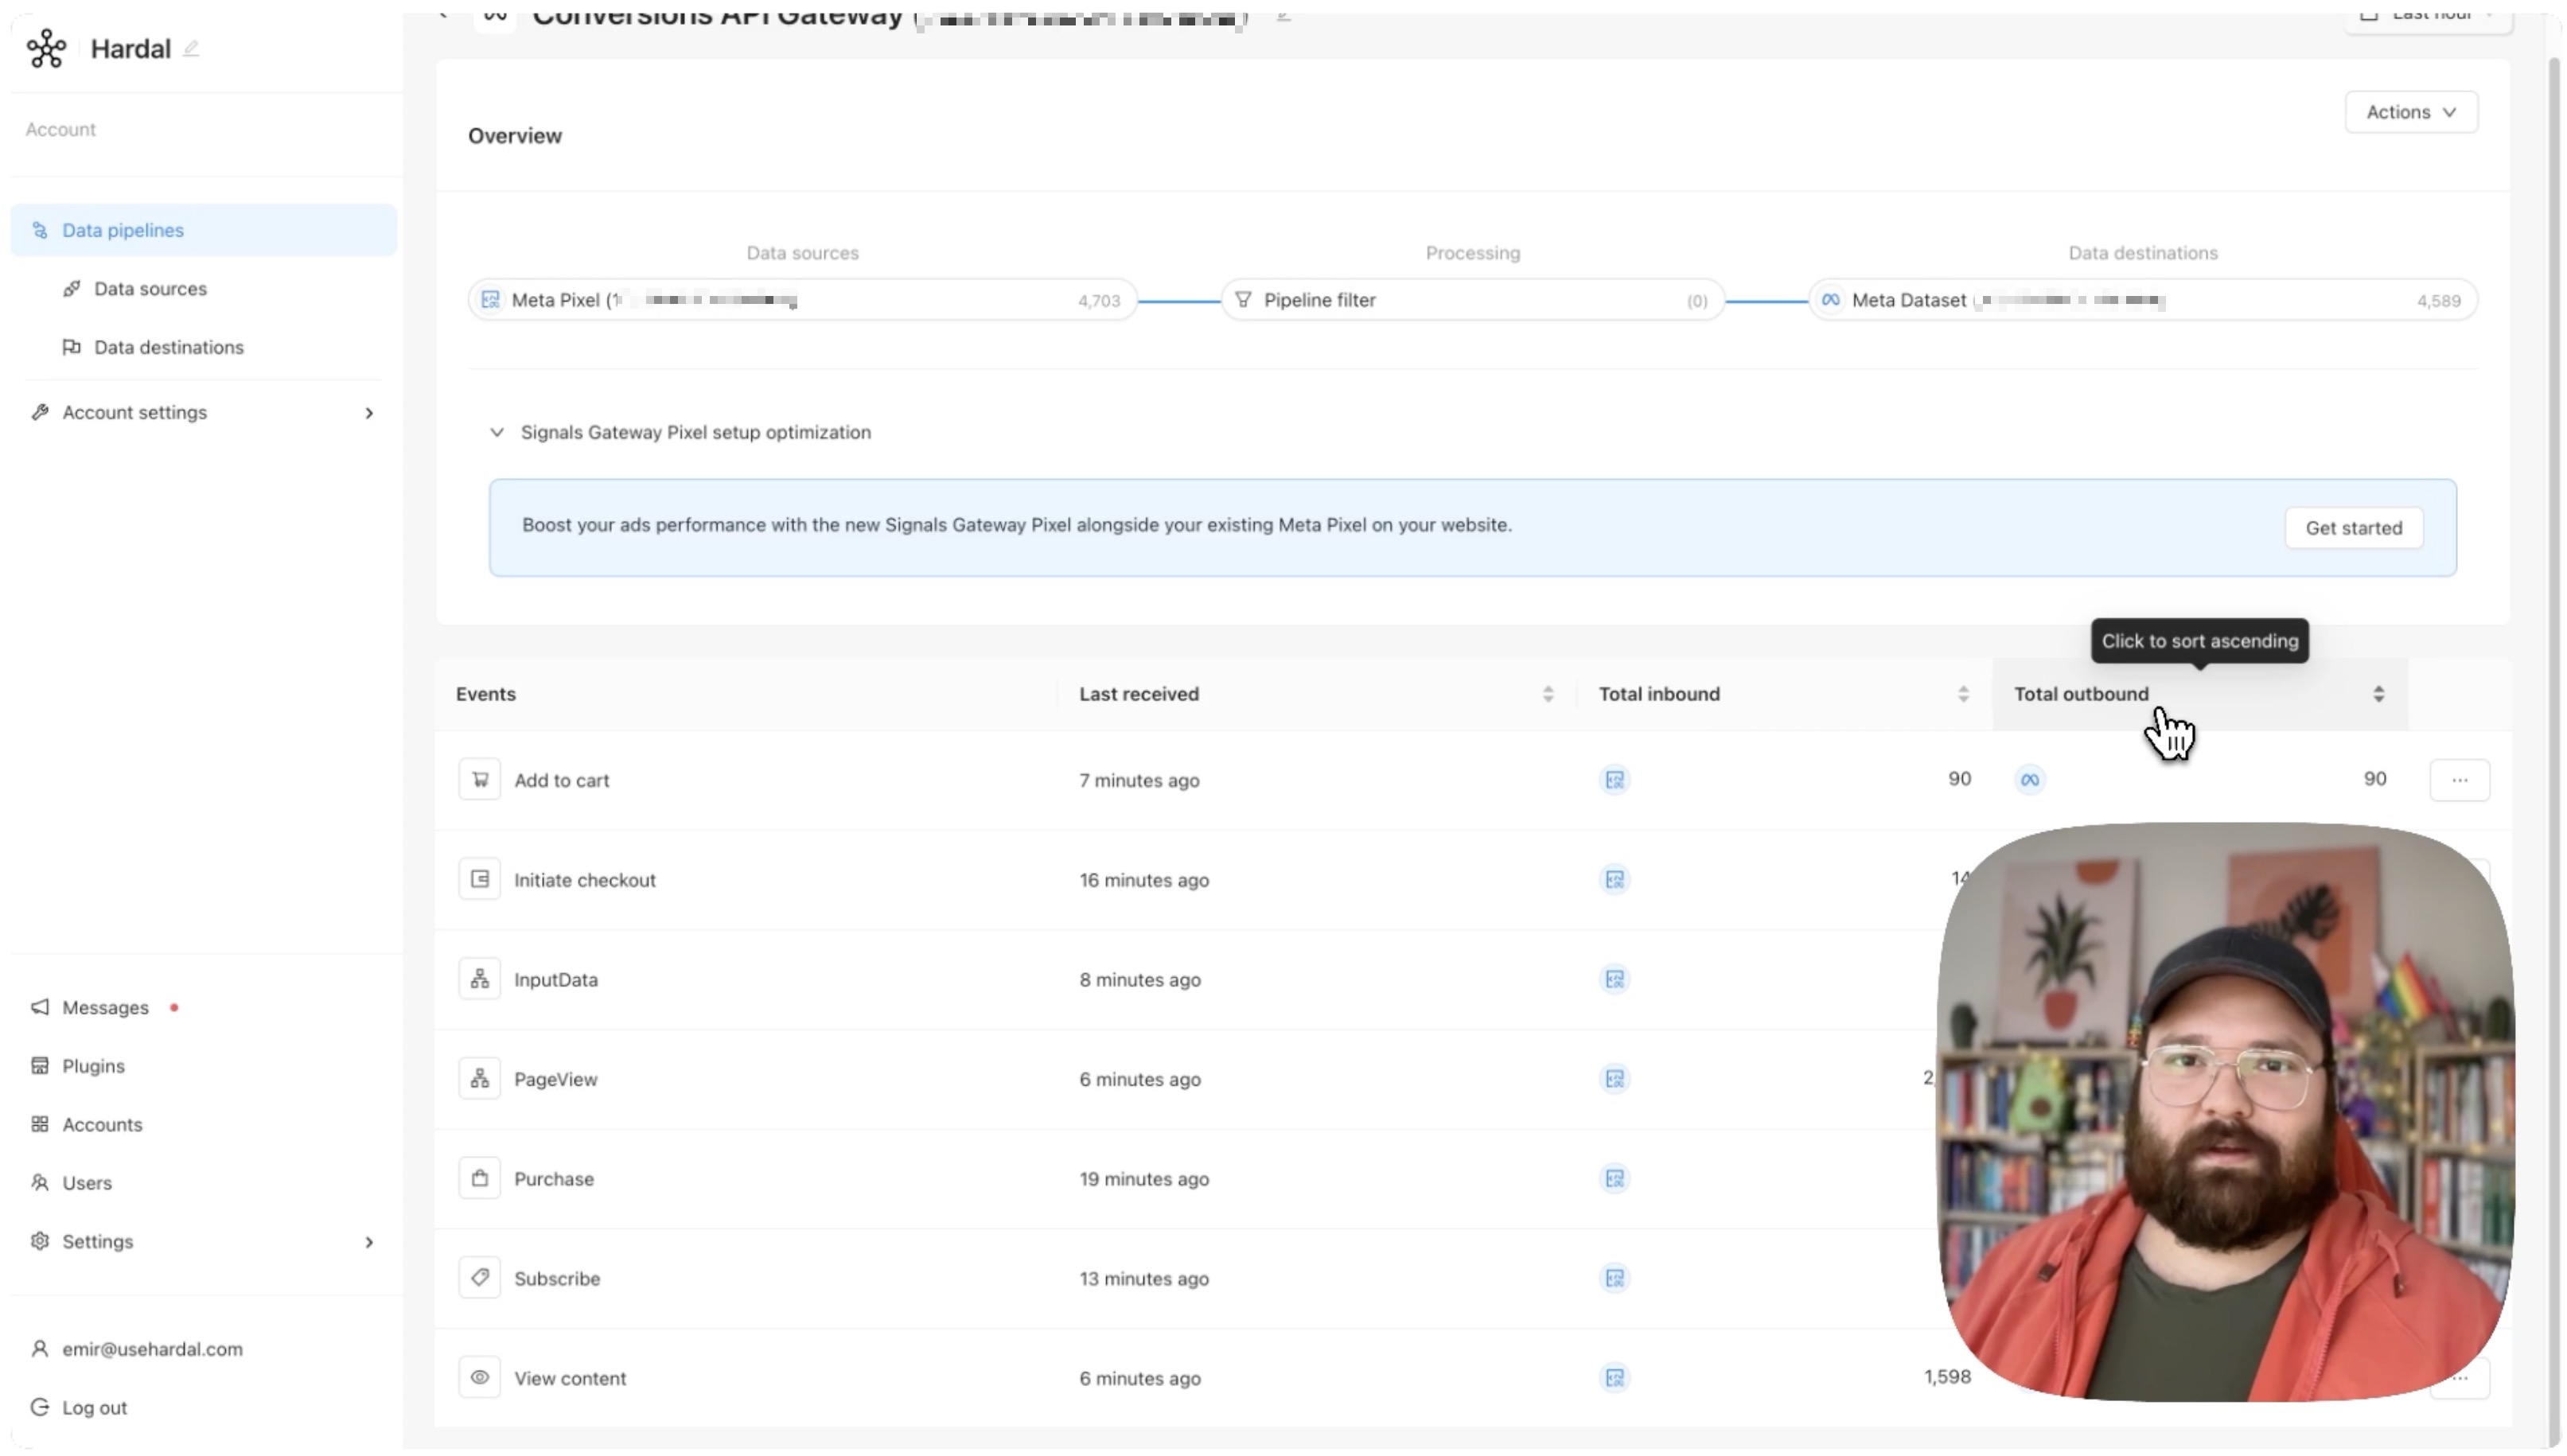
Step 6: Verify Connection
Once created, you should see your connection in the Signals Gateway dashboard. Click on it to view details.
The details page displays:
- Received Events: Events received from your website
- Outbound Events: Events sent to Meta
- Connection Status: Active or inactive
- Configuration Details: Dataset ID, Business ID, etc.
Step 7: Test Your Setup
To verify events are flowing correctly:
In Meta Events Manager:
- Go to Meta Events Manager
- Select your pixel
- Click on Test Events
- You should see events coming from "Conversions API"
Understanding Event Match Quality
After setup, monitor your Event Match Quality (EMQ) in Meta Events Manager:
- Good: 80-100% match rate
- Fair: 60-79% match rate
- Poor: Below 60% match rate
To improve EMQ:
- Include user email (hashed)
- Send phone numbers (hashed)
- Add more user parameters
- Ensure data format is correct
Next Steps
Now that your Meta CAPI Gateway is set up:
- Configure first-party domain for improved tracking
- Set up deduplication between Pixel and CAPI events
- Configure custom conversions in Meta Events Manager
- Monitor Event Match Quality regularly
- Test conversion events with Meta's Test Events tool
Additional Resources
Your Meta Conversion API Gateway is now active, providing enhanced tracking and better attribution for your Facebook and Instagram ad campaigns.
For a more detailed walkthrough, check out our step-by-step guide. How To Set Up Meta Conversion API Gateway with Hardal