Setting up your Meta Pixel with a first-party domain improves data collection and helps bypass tracking restrictions. This guide shows you how to configure it through Hardal.
Prerequisites
Before starting, ensure you have:
- Active Hardal account with a configured signal
- Meta Conversion API Gateway connection set up in Hardal
- Access to your DNS settings
Step 1: Configure DNS Record
Navigate to your Hardal dashboard and select your signal. Go to Server Side Hosts and verify your Meta Conversion API Gateway connection is configured.
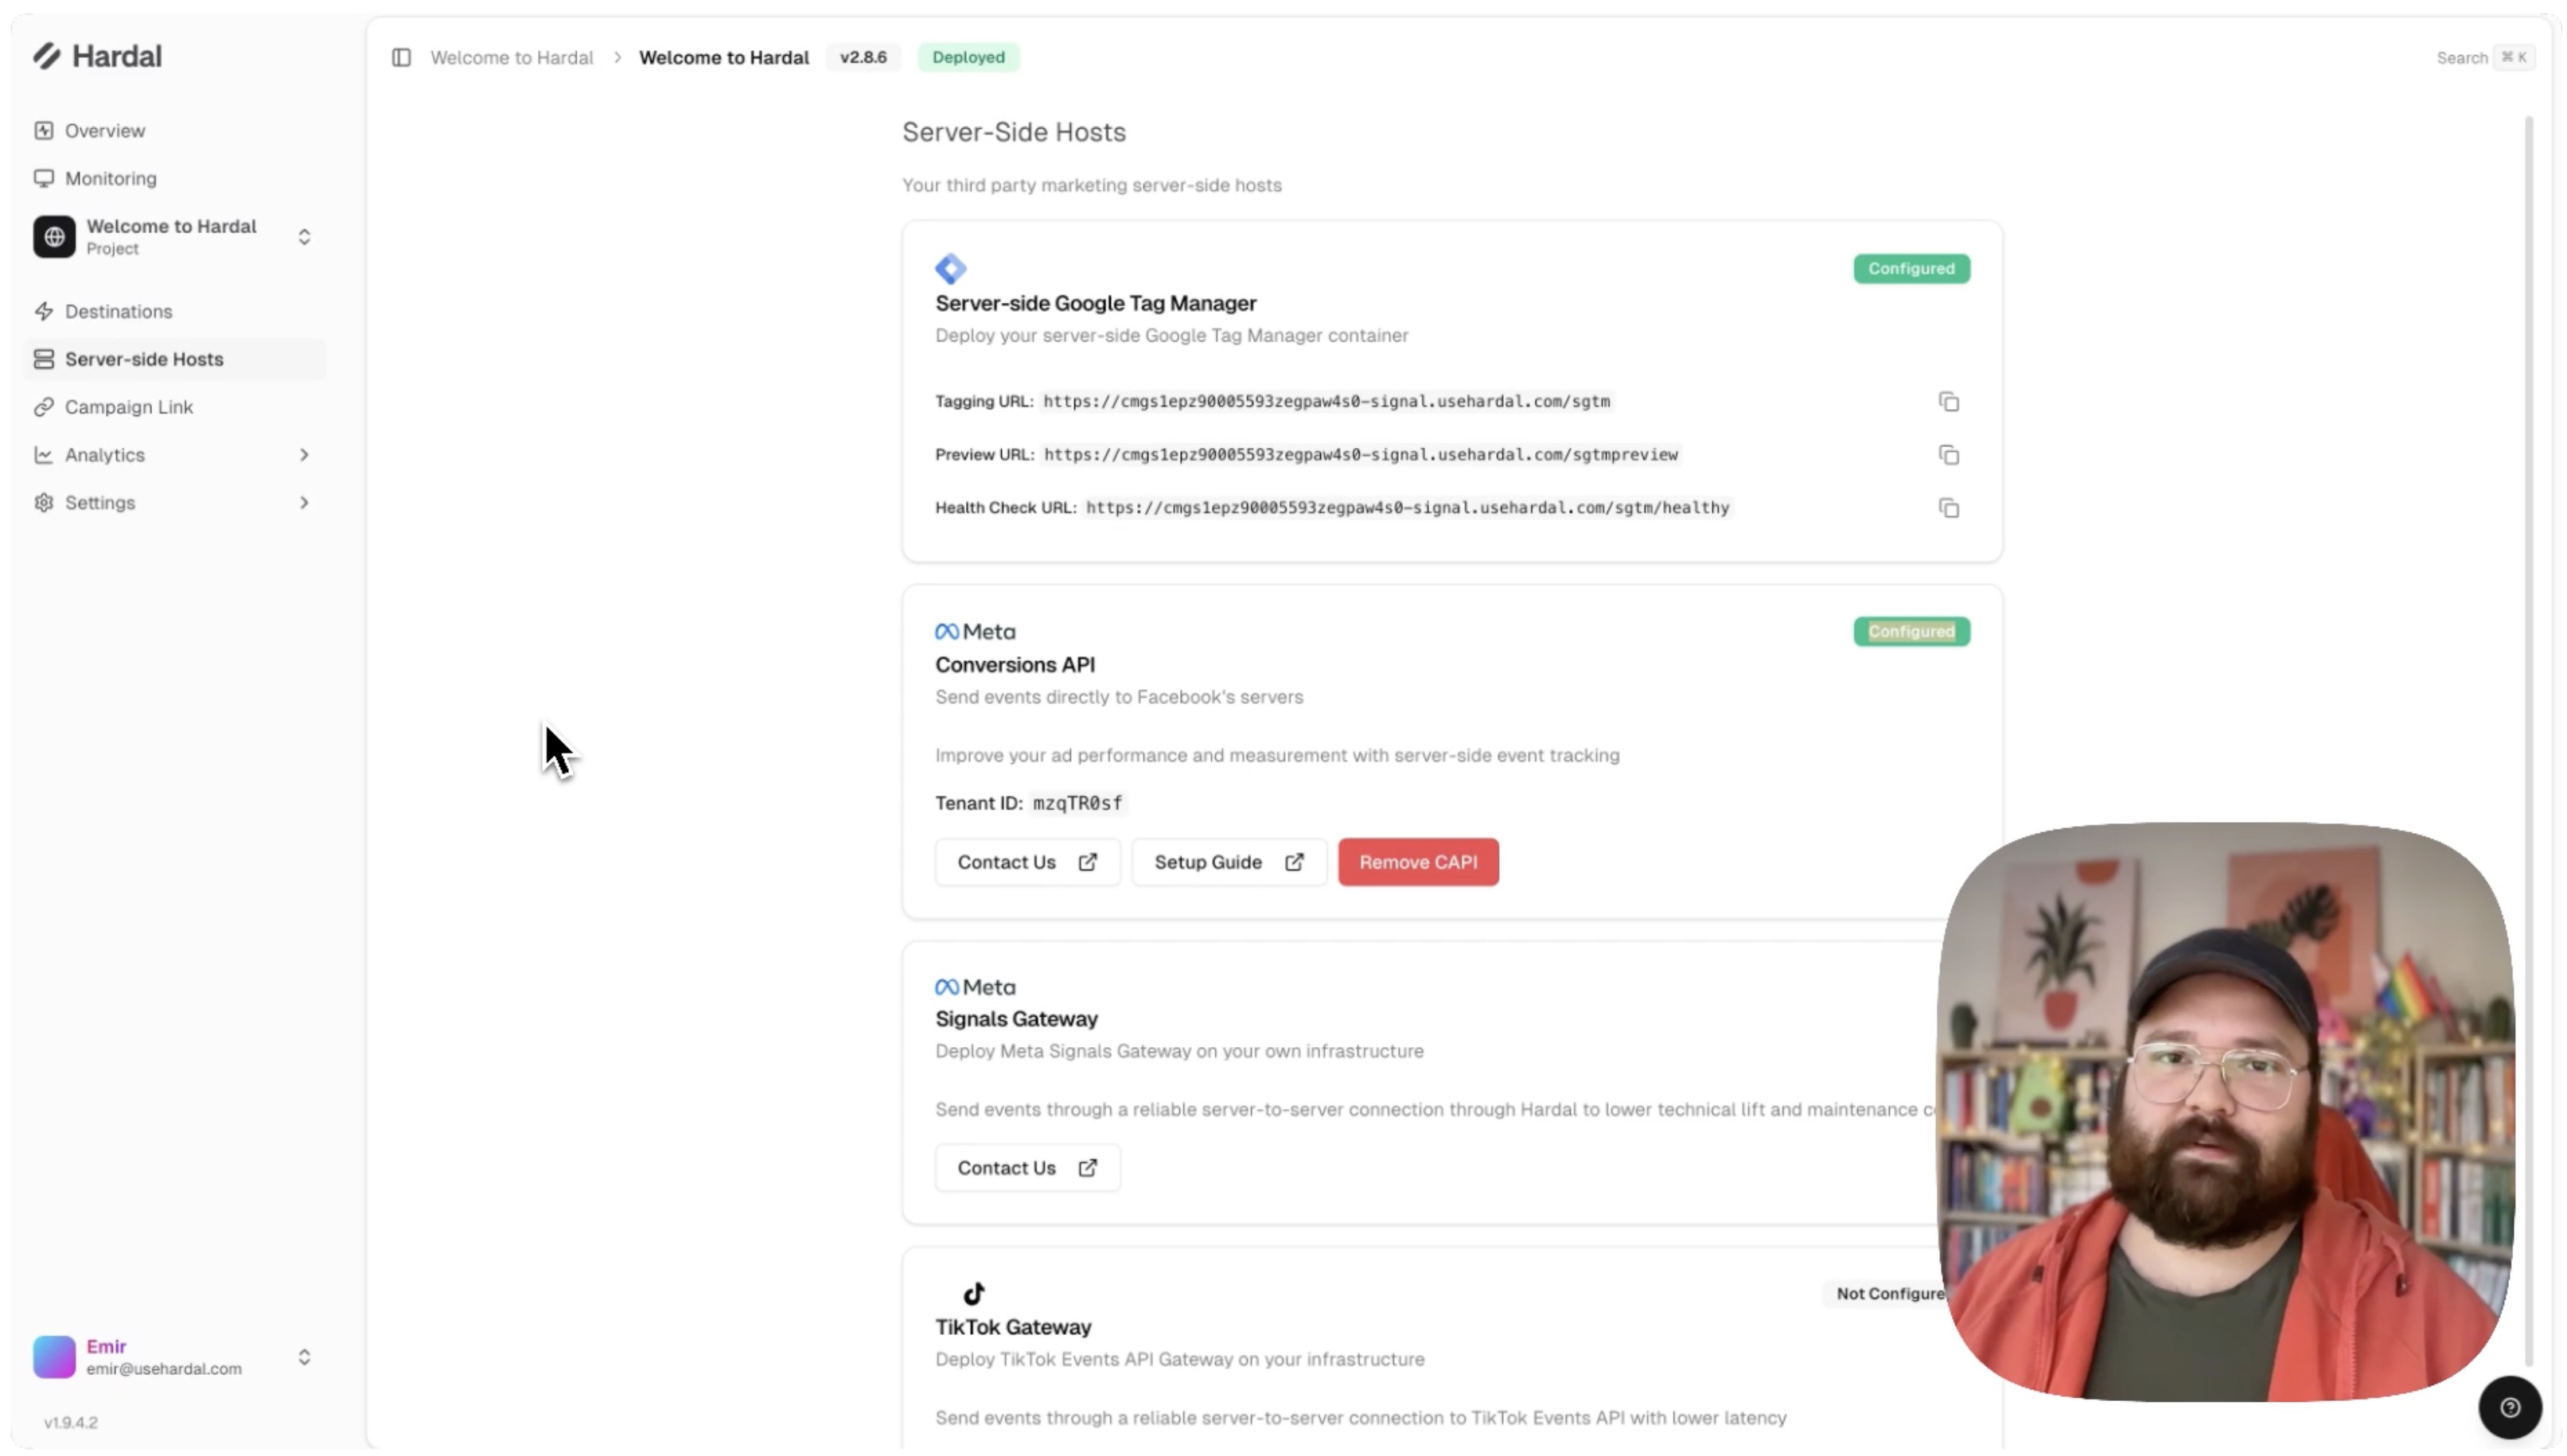
Then go to Settings > Setup. Scroll down to find the specific DNS record details.

Share these DNS record details with your IT team to set up:
- CNAME record pointing to Hardal's infrastructure
- TXT record for verification
Step 2: Configure Meta Account
Once your IT team confirms the DNS records are set up, navigate to your Signal Gateway dashboard and select your Meta CAPI connection.
Go to Account Settings > Data Routing and click Optimize.
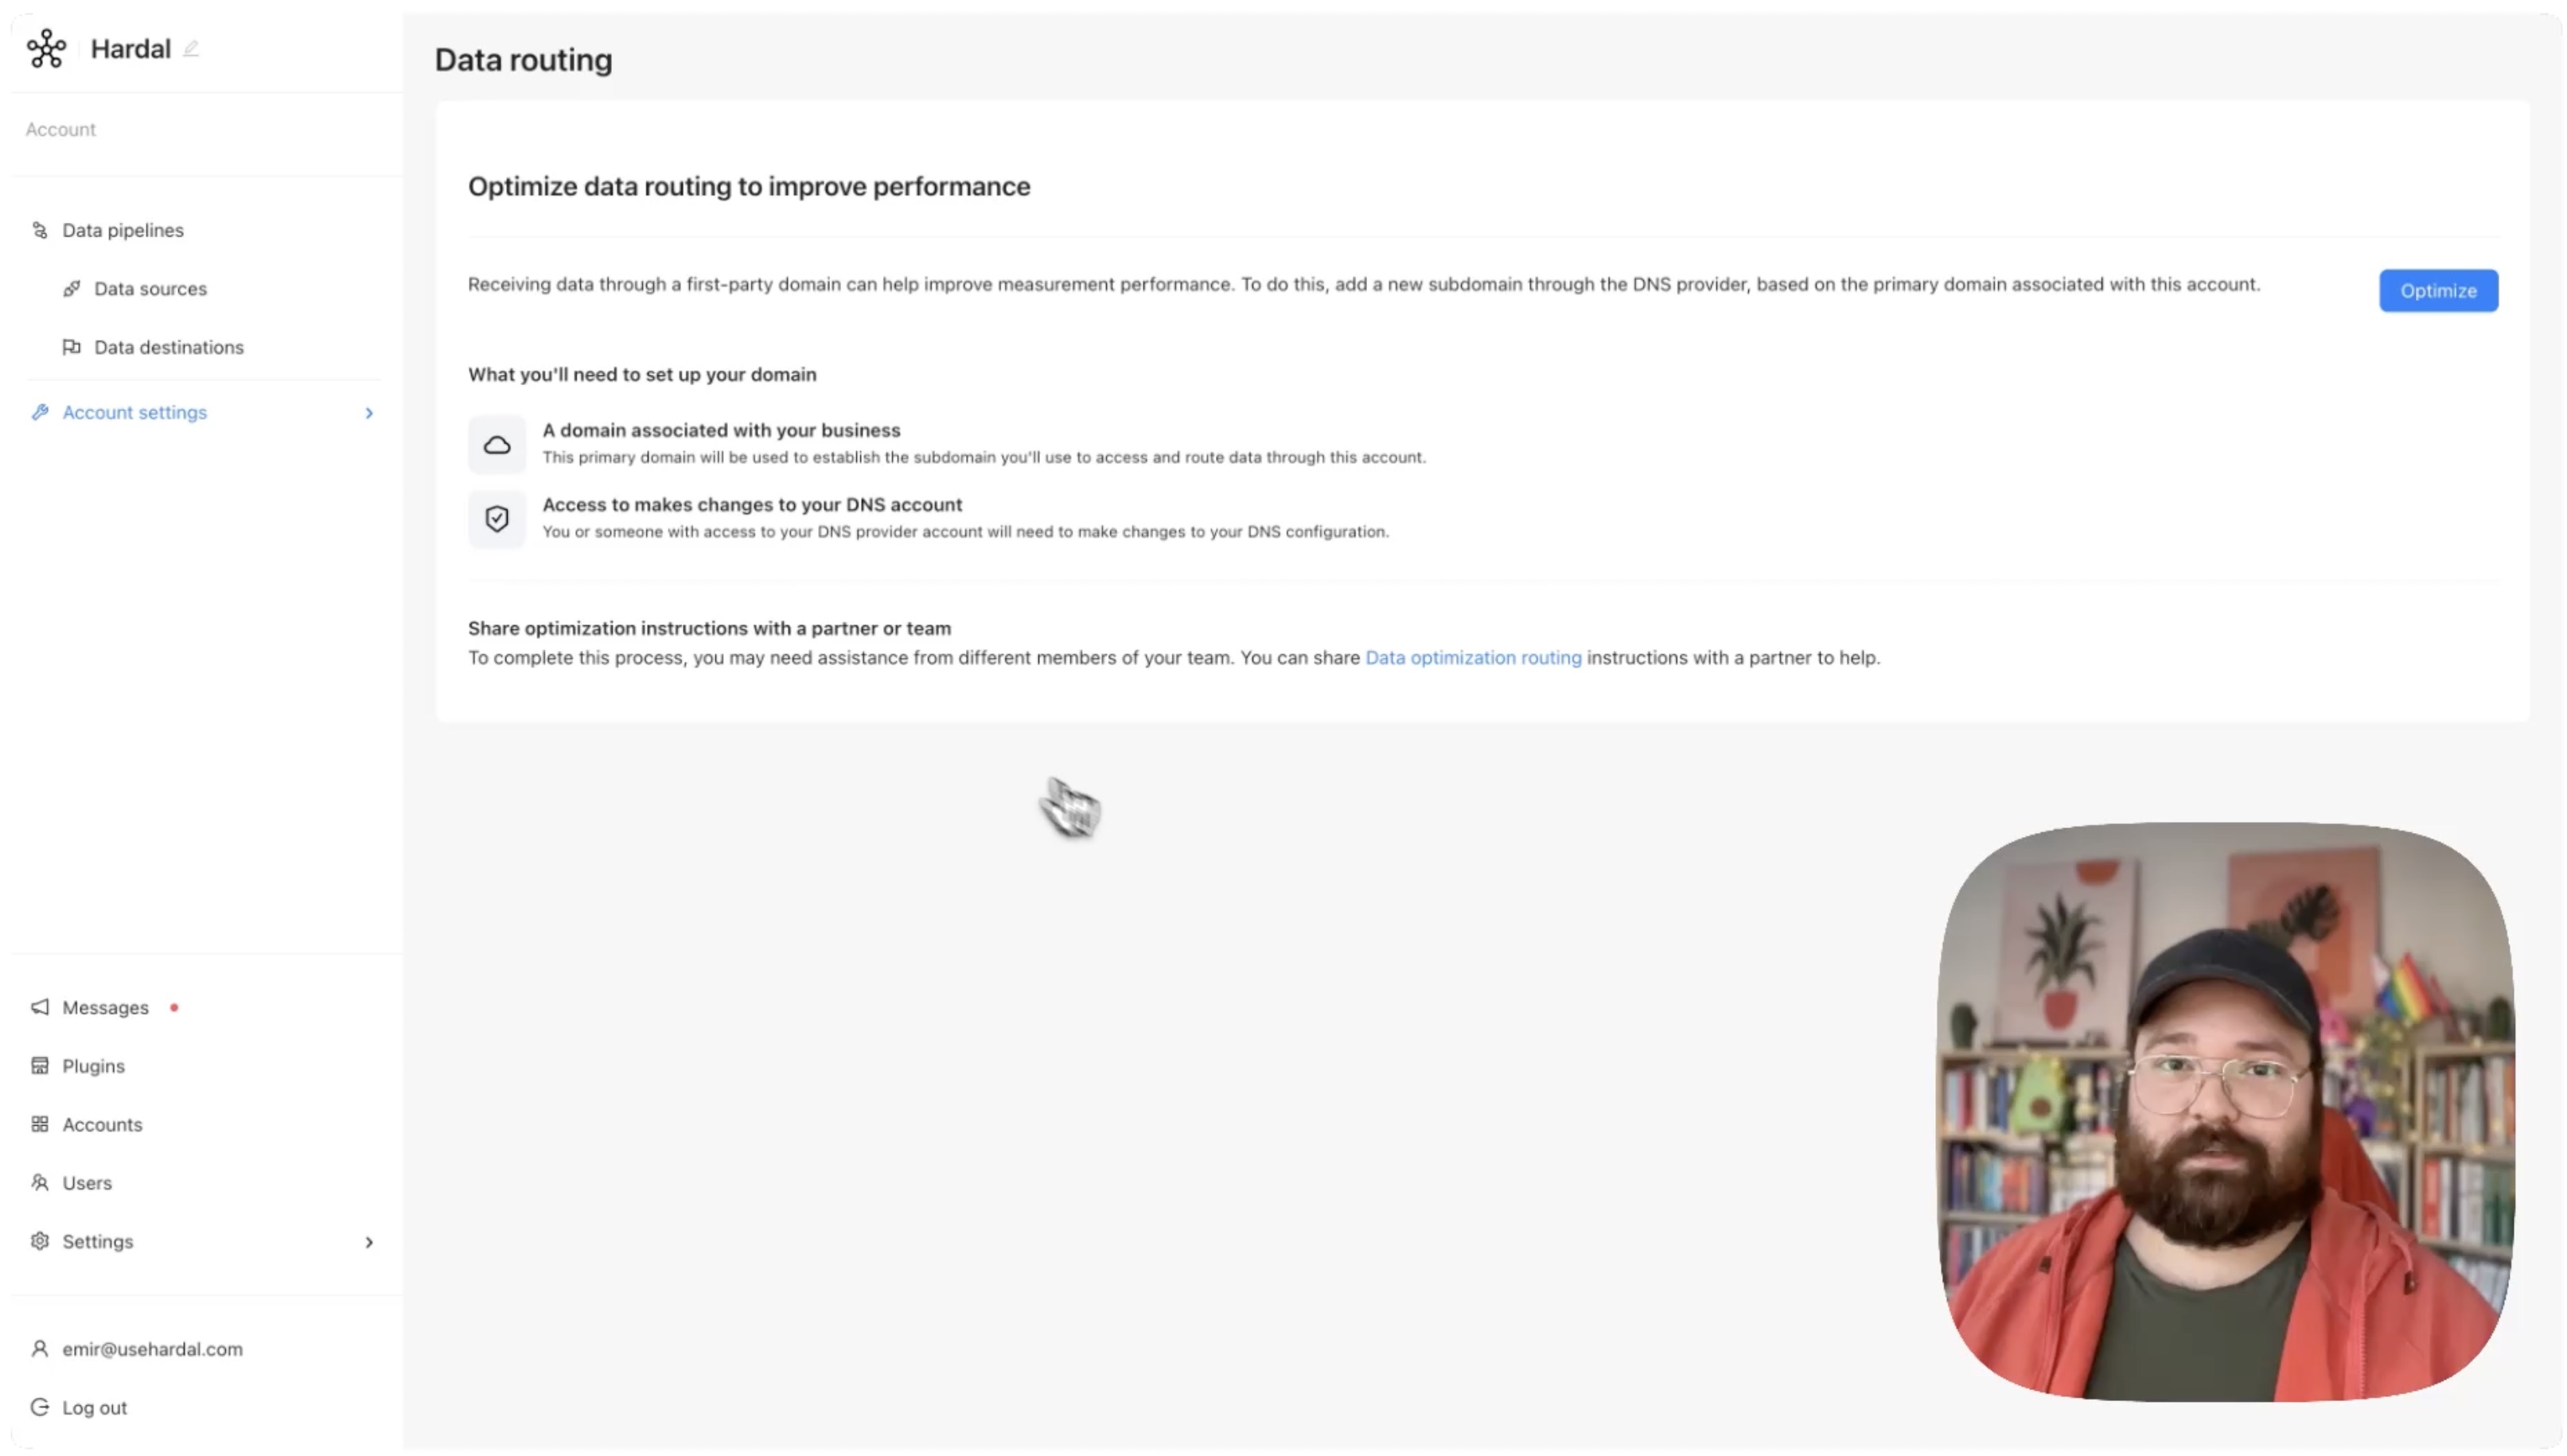
Enter your new CAPI domain (e.g., capi.yourwebsite.com) and click Continue.
If the DNS records are correctly configured, you'll see a success message.
Step 3: Verify Your Setup
After a few minutes, check your website to confirm that Meta Pixel and CAPI are working under your first-party domain.
You can verify this by:
- Opening your browser's developer tools
- Going to the Network tab
- Looking for requests to your custom domain (e.g.,
capi.yourwebsite.com)
Your Meta Pixel is now operating through your first-party domain, providing better data accuracy and improved tracking reliability.
For a more detailed walkthrough, check out our step-by-step guide. How To Set Up First Party Domain For Meta CAPI