Setting up a first-party domain for TikTok Events API improves tracking reliability and data accuracy. This guide walks you through the configuration process in Hardal.
Prerequisites
Before starting, ensure you have:
- TikTok Events API Gateway configured in Hardal
- Access to your DNS settings
- IT support (if you don't manage DNS yourself)
If you haven't set up TikTok Gateway yet, see our TikTok Events API Gateway setup guide.
Step 1: Access TikTok Gateway Dashboard
Navigate to your Hardal dashboard, select your signal, and click Server Side Hosts. Verify that your TikTok Gateway is configured and active.
Click on the TikTok Gateway link to access the TikTok Events API Gateway dashboard.
Step 2: Start Domain Setup
In the TikTok Events API Gateway dashboard:
- Click on Settings
- Select Set up domain
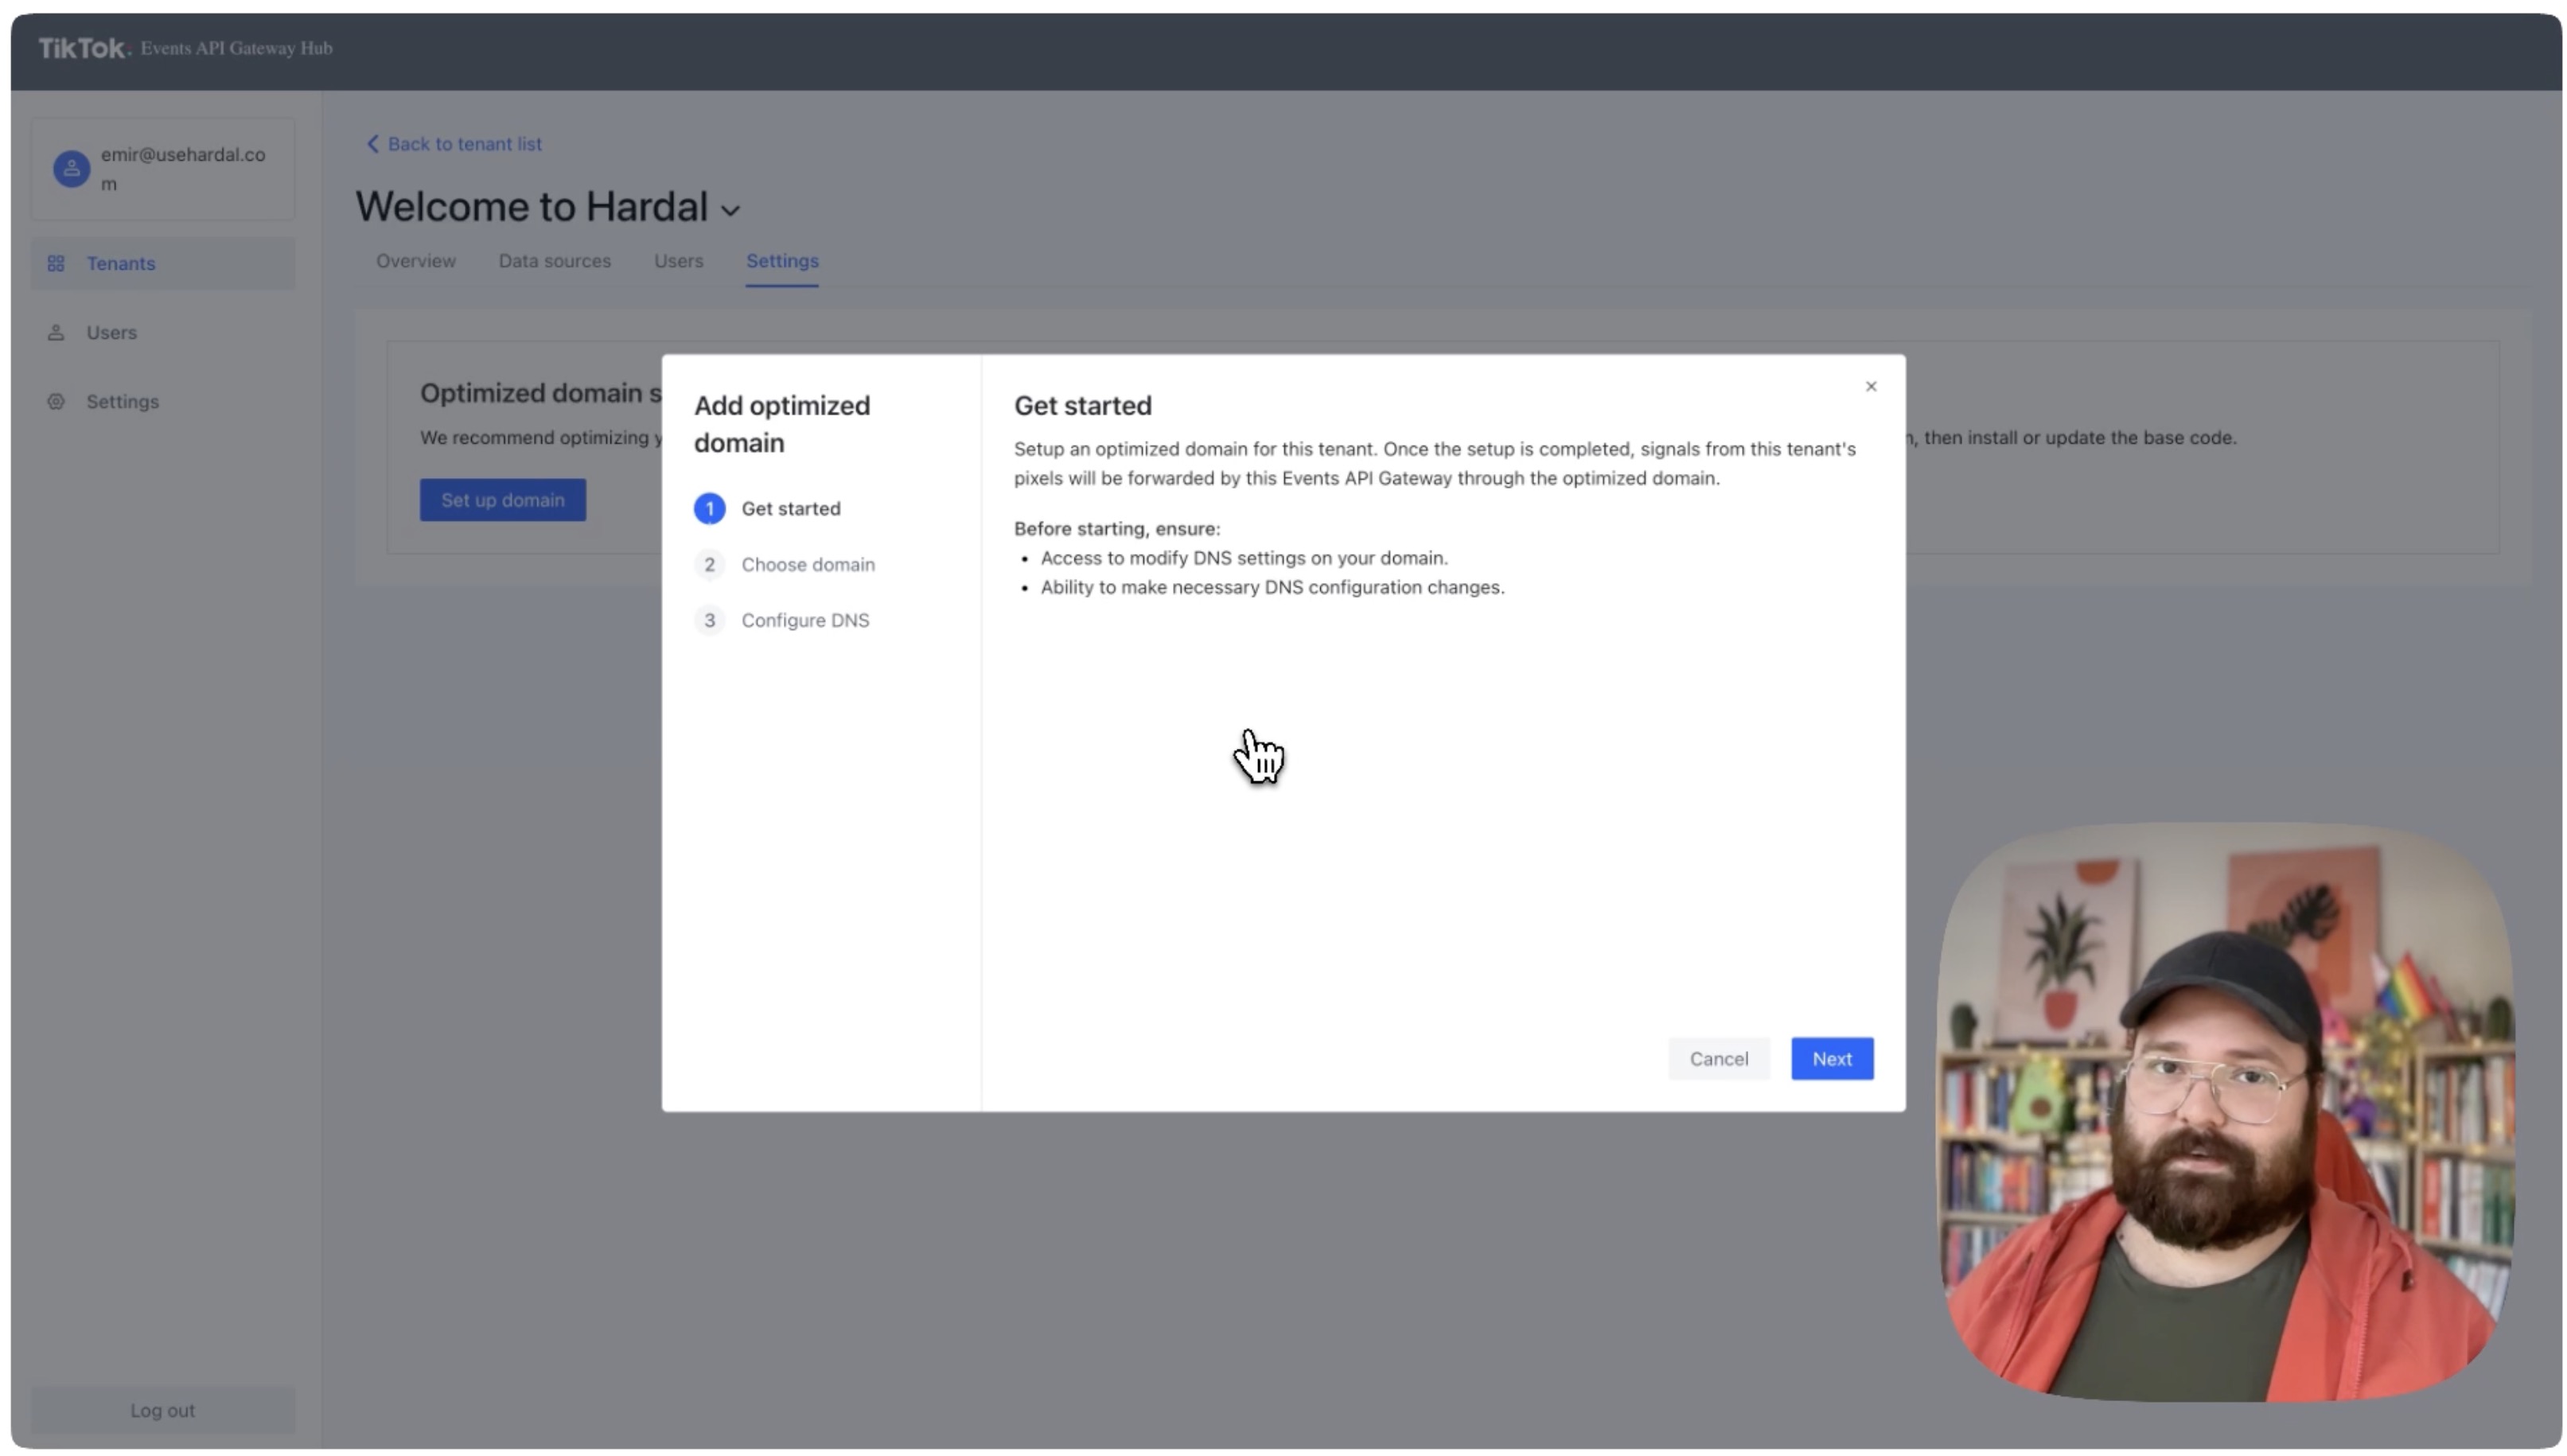
You'll see information about the DNS records that need to be configured. Click Next to continue.
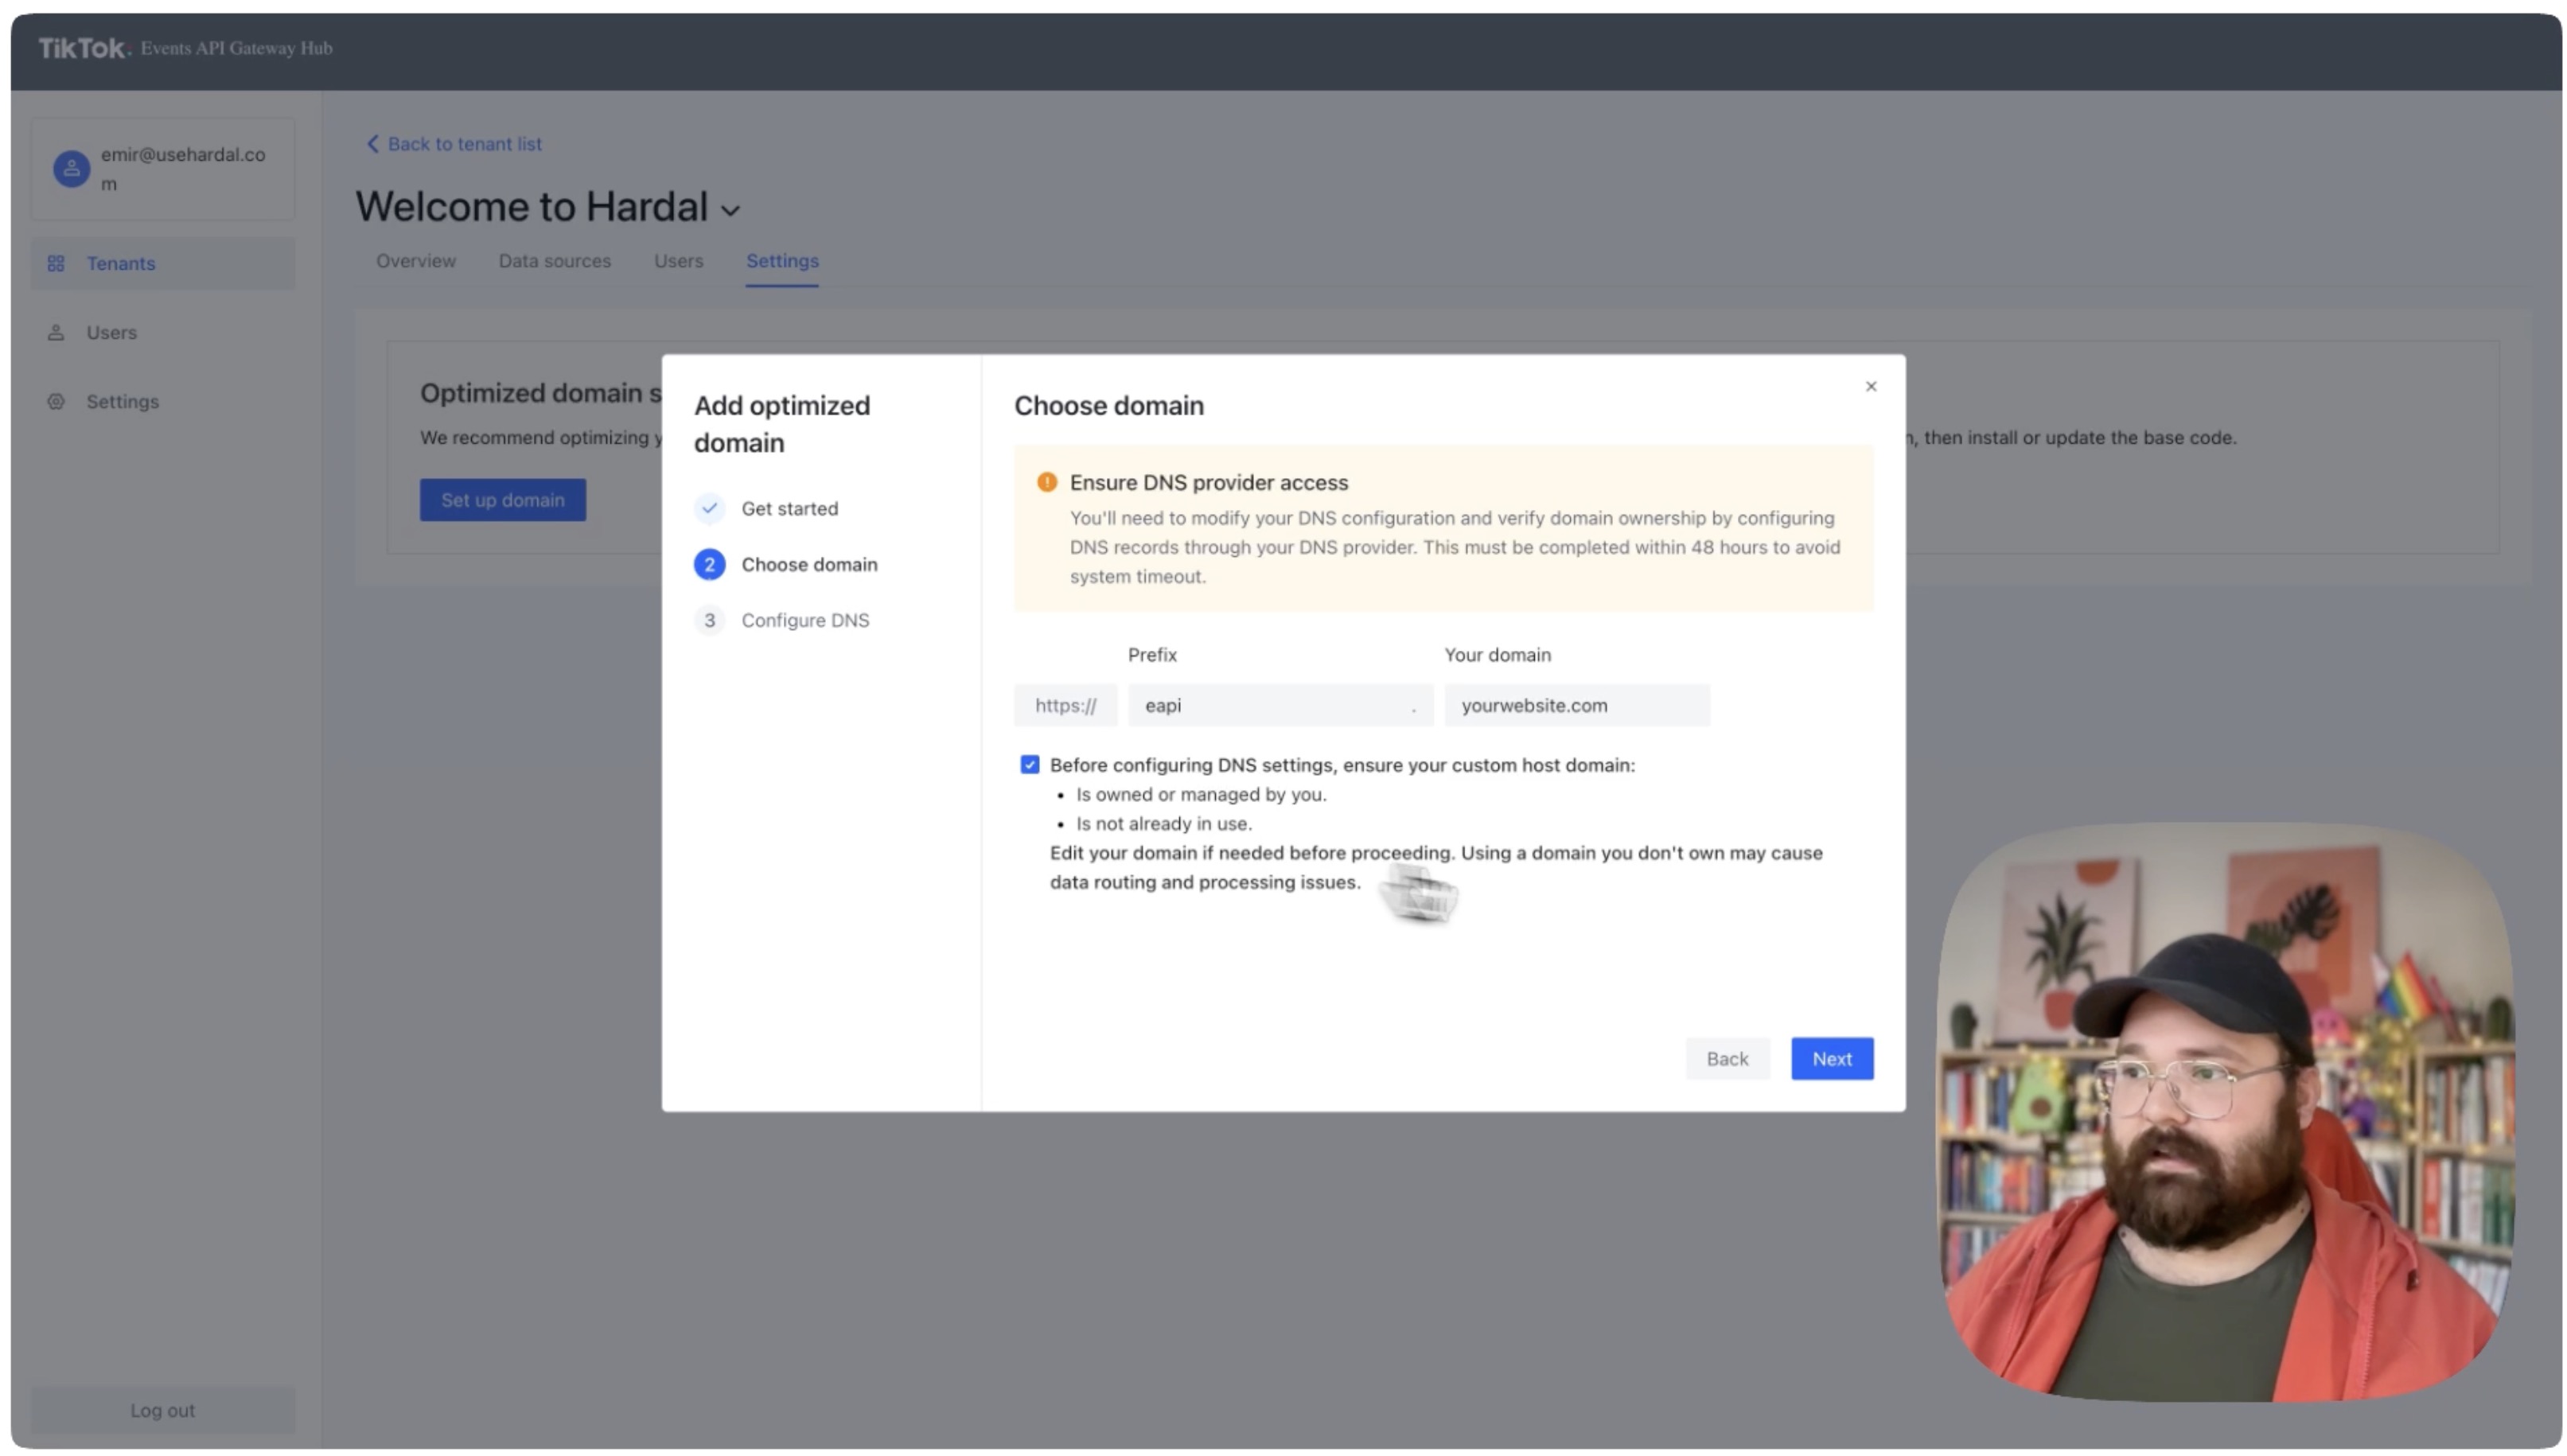
Step 3: Choose Your Domain
Enter your desired first-party domain for TikTok Pixel. The format should be:
eapi.yourwebsite.com
Or any subdomain you prefer, such as:
tiktok.yourwebsite.comevents.yourwebsite.comtracking.yourwebsite.com
Set as Primary Domain
If you want this to be your TikTok Pixel's primary tracking domain:
- Check the box for "Set as primary domain"
- This ensures all pixel requests use this domain
Click Next to proceed.
Step 4: Configure DNS Records
The dashboard will display two DNS records that must be set up:
Record 1: CNAME Record
- Type: CNAME
- Name: Your chosen subdomain (e.g.,
eapi) - Value: TikTok's gateway endpoint (provided in dashboard)
Record 2: TXT Record
- Type: TXT
- Name: Your subdomain with verification prefix
- Value: Verification token (provided in dashboard)
Step 5: Implement DNS Changes
For Technical Users:
- Log in to your DNS provider (e.g., Cloudflare, GoDaddy, Namecheap)
- Navigate to DNS settings for your domain
- Add both records as specified
- Save changes
For Non-Technical Users:
Send the DNS record information to your IT team:
- Copy the record details from the dashboard
- Email your IT team with the requirements
- Ask them to configure the DNS records
- Wait for confirmation of completion
Step 6: Verify DNS Configuration
DNS changes can take time to propagate. Check the status in your TikTok Gateway dashboard:
The status indicators should show:
- CNAME Record: ✓ Completed
- TXT Record: ✓ Completed
Note: DNS propagation typically takes:
- Minimum: 15 minutes
- Average: 1-2 hours
- Maximum: 24-48 hours (in rare cases)
Step 7: Activate First-Party Tracking
Once both DNS records are verified:
- The dashboard will confirm successful setup
- Your TikTok Pixel will automatically begin using the first-party domain
- All tracking requests will route through your custom domain
Step 8: Verify on Your Website
To confirm the first-party domain is working:
Using Browser DevTools:
- Visit your website
- Open DevTools (F12)
- Go to the Network tab
- Refresh the page
- Look for requests to your custom domain (e.g.,
eapi.yourwebsite.com)
Using TikTok Events Manager:
- Go to TikTok Events Manager
- Select your pixel
- Check the Event Debugger
- Events should show as coming from your first-party domain
Benefits of First-Party Domain
Using a first-party domain provides:
- Improved Data Accuracy: Reduced data loss from ad blockers
- Better Event Match Quality: More reliable user identification
- Enhanced Attribution: Improved conversion tracking
- Longer Cookie Lifespan: First-party cookies last longer than third-party
- Increased Trust: Users see tracking from your own domain
Your TikTok Pixel now operates through your first-party domain, providing enhanced tracking reliability and improved data quality for your TikTok advertising campaigns.
For a more detailed walkthrough, check out our step-by-step guide. How To Set Up Tiktok Events API Gateway with Hardal