Setting up Hardal with a first-party domain improves tracking accuracy and helps bypass ad blockers. This guide shows you how to configure your DNS settings and verify the setup.
Why Use a First-Party Domain?
First-party domains offer several advantages:
- Better Data Accuracy: Reduced chance of blocked requests
- Ad Blocker Bypass: First-party requests are less likely to be blocked
- Improved Trust: Users see requests coming from your own domain
- Enhanced Privacy: Keep data within your infrastructure
Step 1: Access Your DNS Configuration
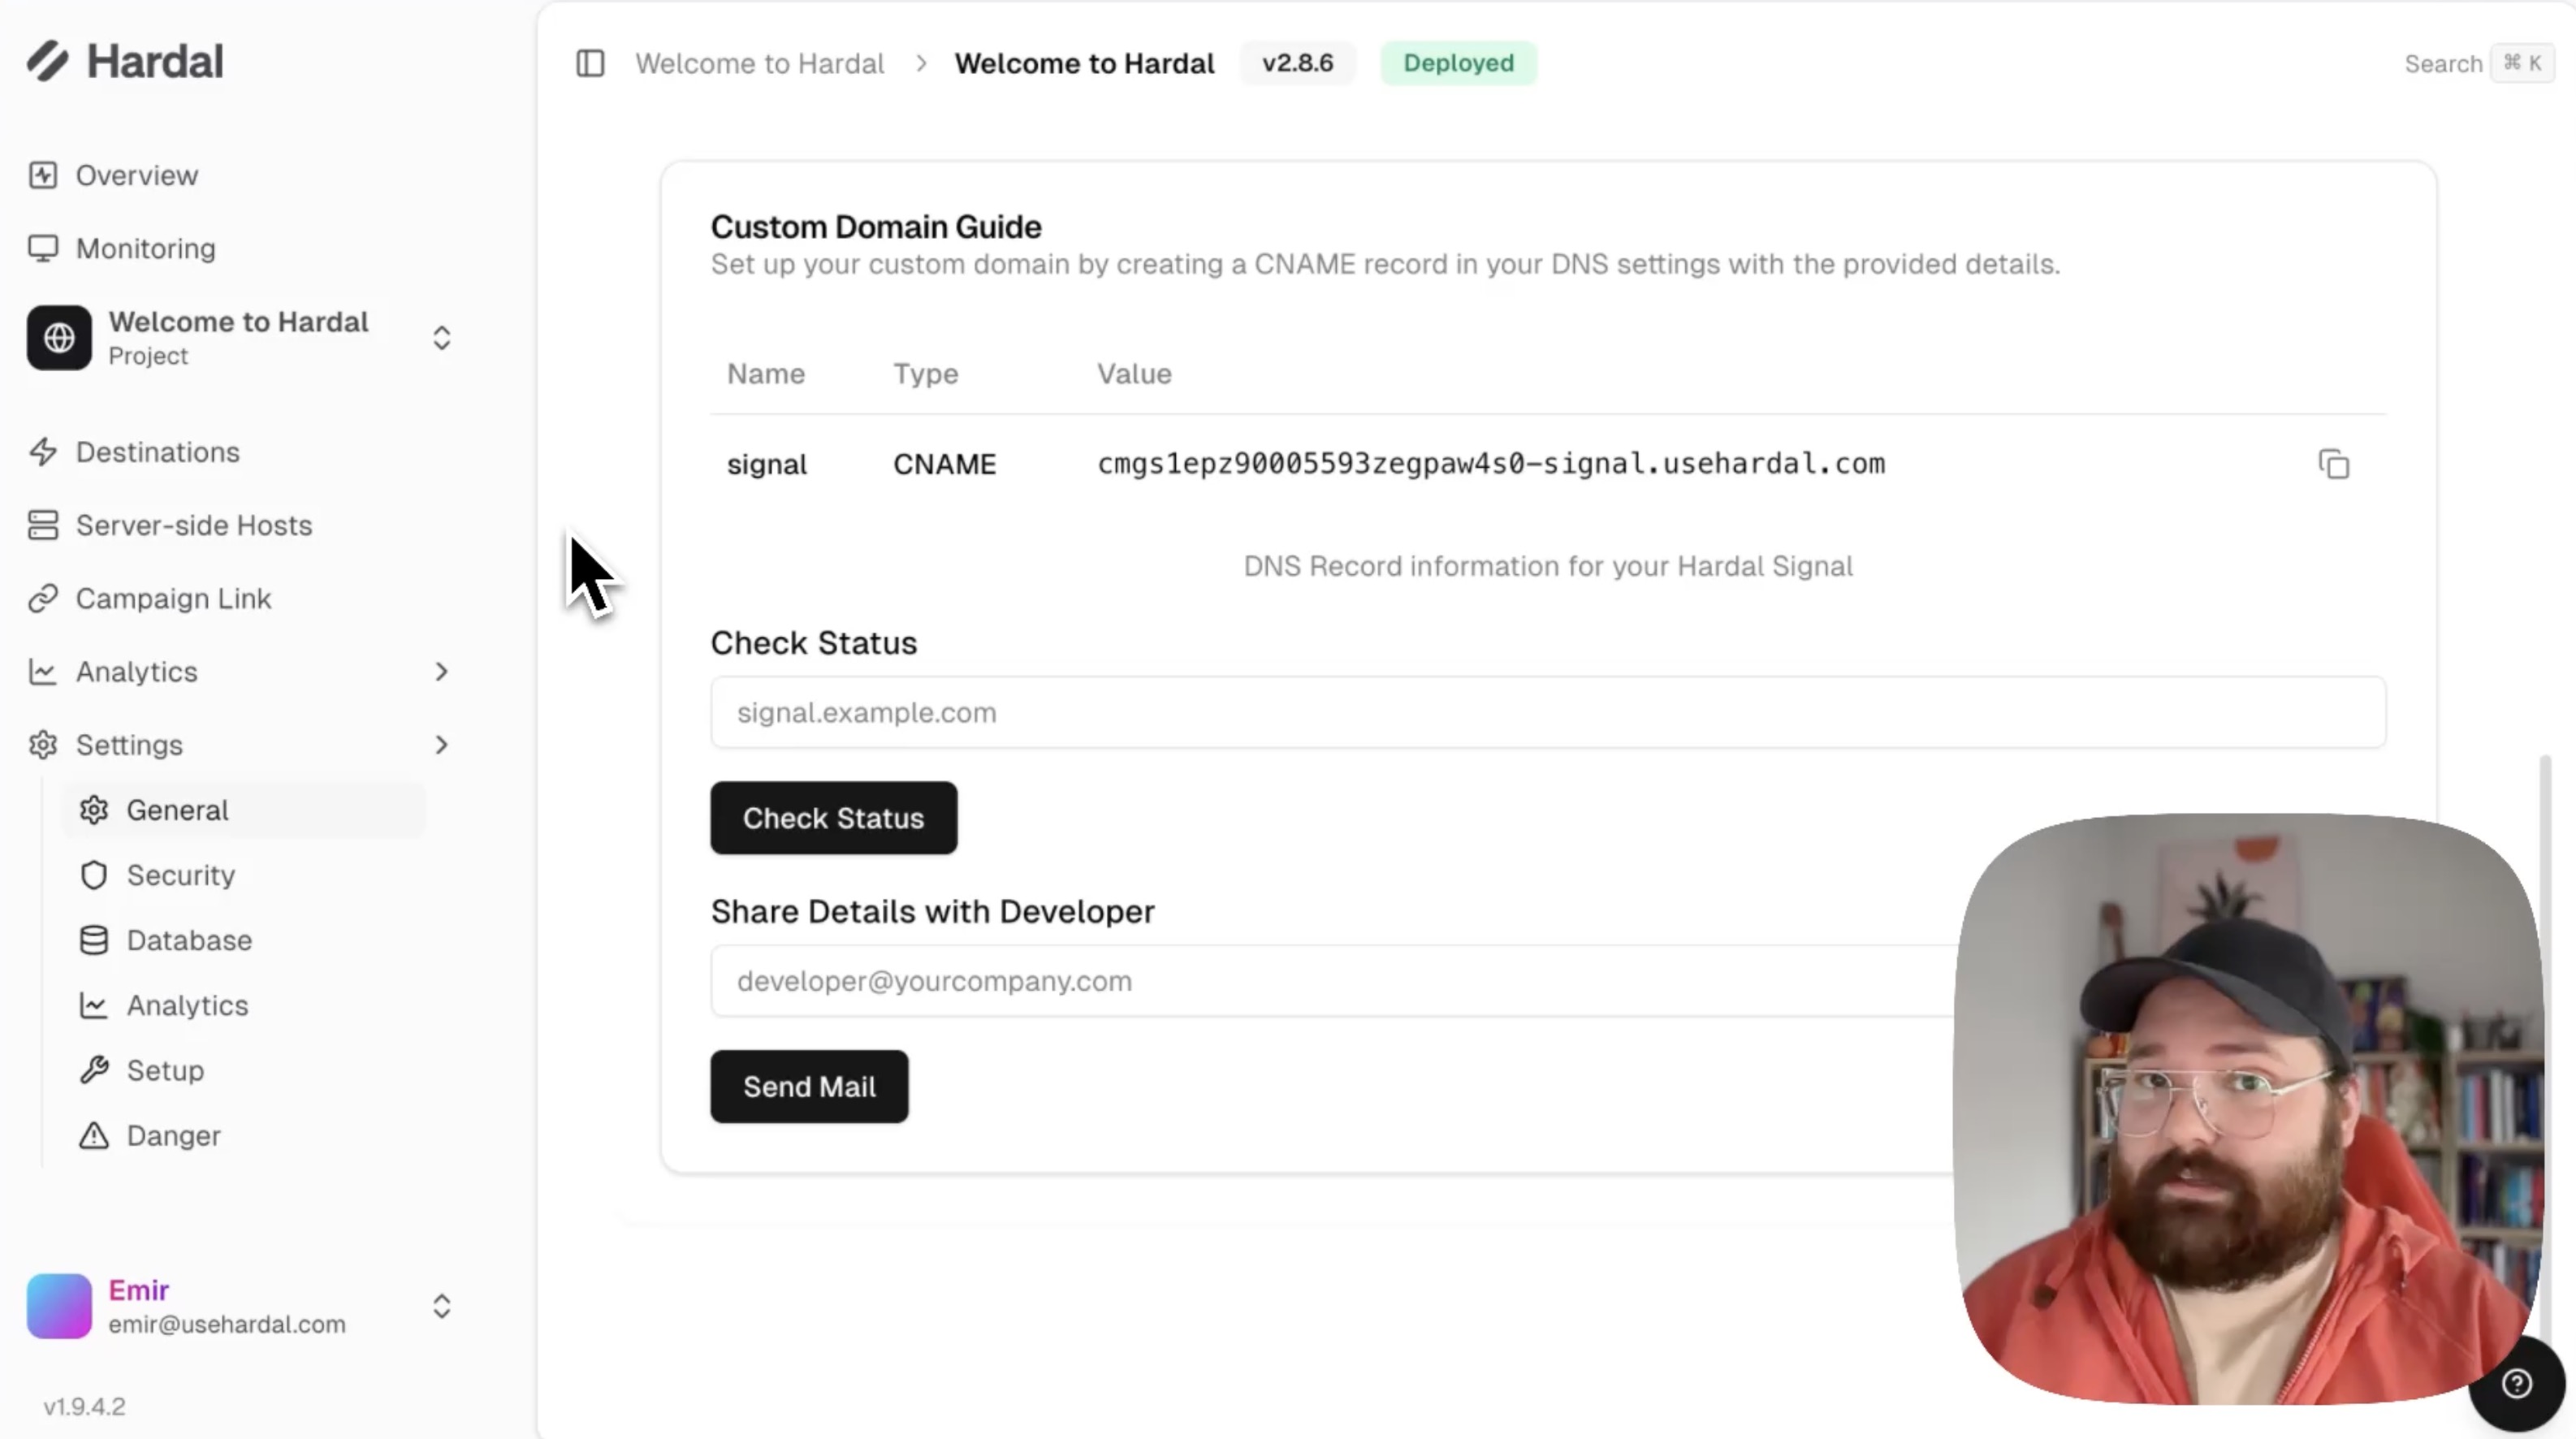
Navigate to your Hardal dashboard and select your signal. Click Settings > Setup in the left menu.
Scroll down to the Custom Domain Guide section. You'll see specific DNS record details that need to be configured.
Step 2: Configure DNS Records
You have two options for setting up the DNS records:
Option 1: For Technical Users
If you're familiar with DNS configuration:
- Copy the provided DNS record details
- Access your domain's DNS management panel
- Create the required records (typically CNAME and TXT records)
- Save the changes
Option 2: Request IT Support
If you're not comfortable with DNS configuration:
- Enter your IT team's email address in the provided field
- Click Send Email
- Your IT team will receive all necessary details
- They can configure the DNS records on your behalf
The DNS records typically include:
- CNAME record: Points your subdomain to Hardal's infrastructure
- TXT record: Verifies domain ownership
Step 3: Verify Your Configuration
After the DNS records are set up, verify the configuration:
- Wait a few minutes for DNS propagation (can take up to 24 hours in some cases)
- Enter your new domain in the verification field (e.g.,
analytics.yourwebsite.com) - Click Check Status
If configured correctly, you'll see a success message indicating your first-party domain is active.
Step 4: Update Your Tracking Script
Once verification is complete, your Hardal tracking script will automatically update with your first-party domain. The URL section will now reference your custom domain instead of Hardal's default domain.
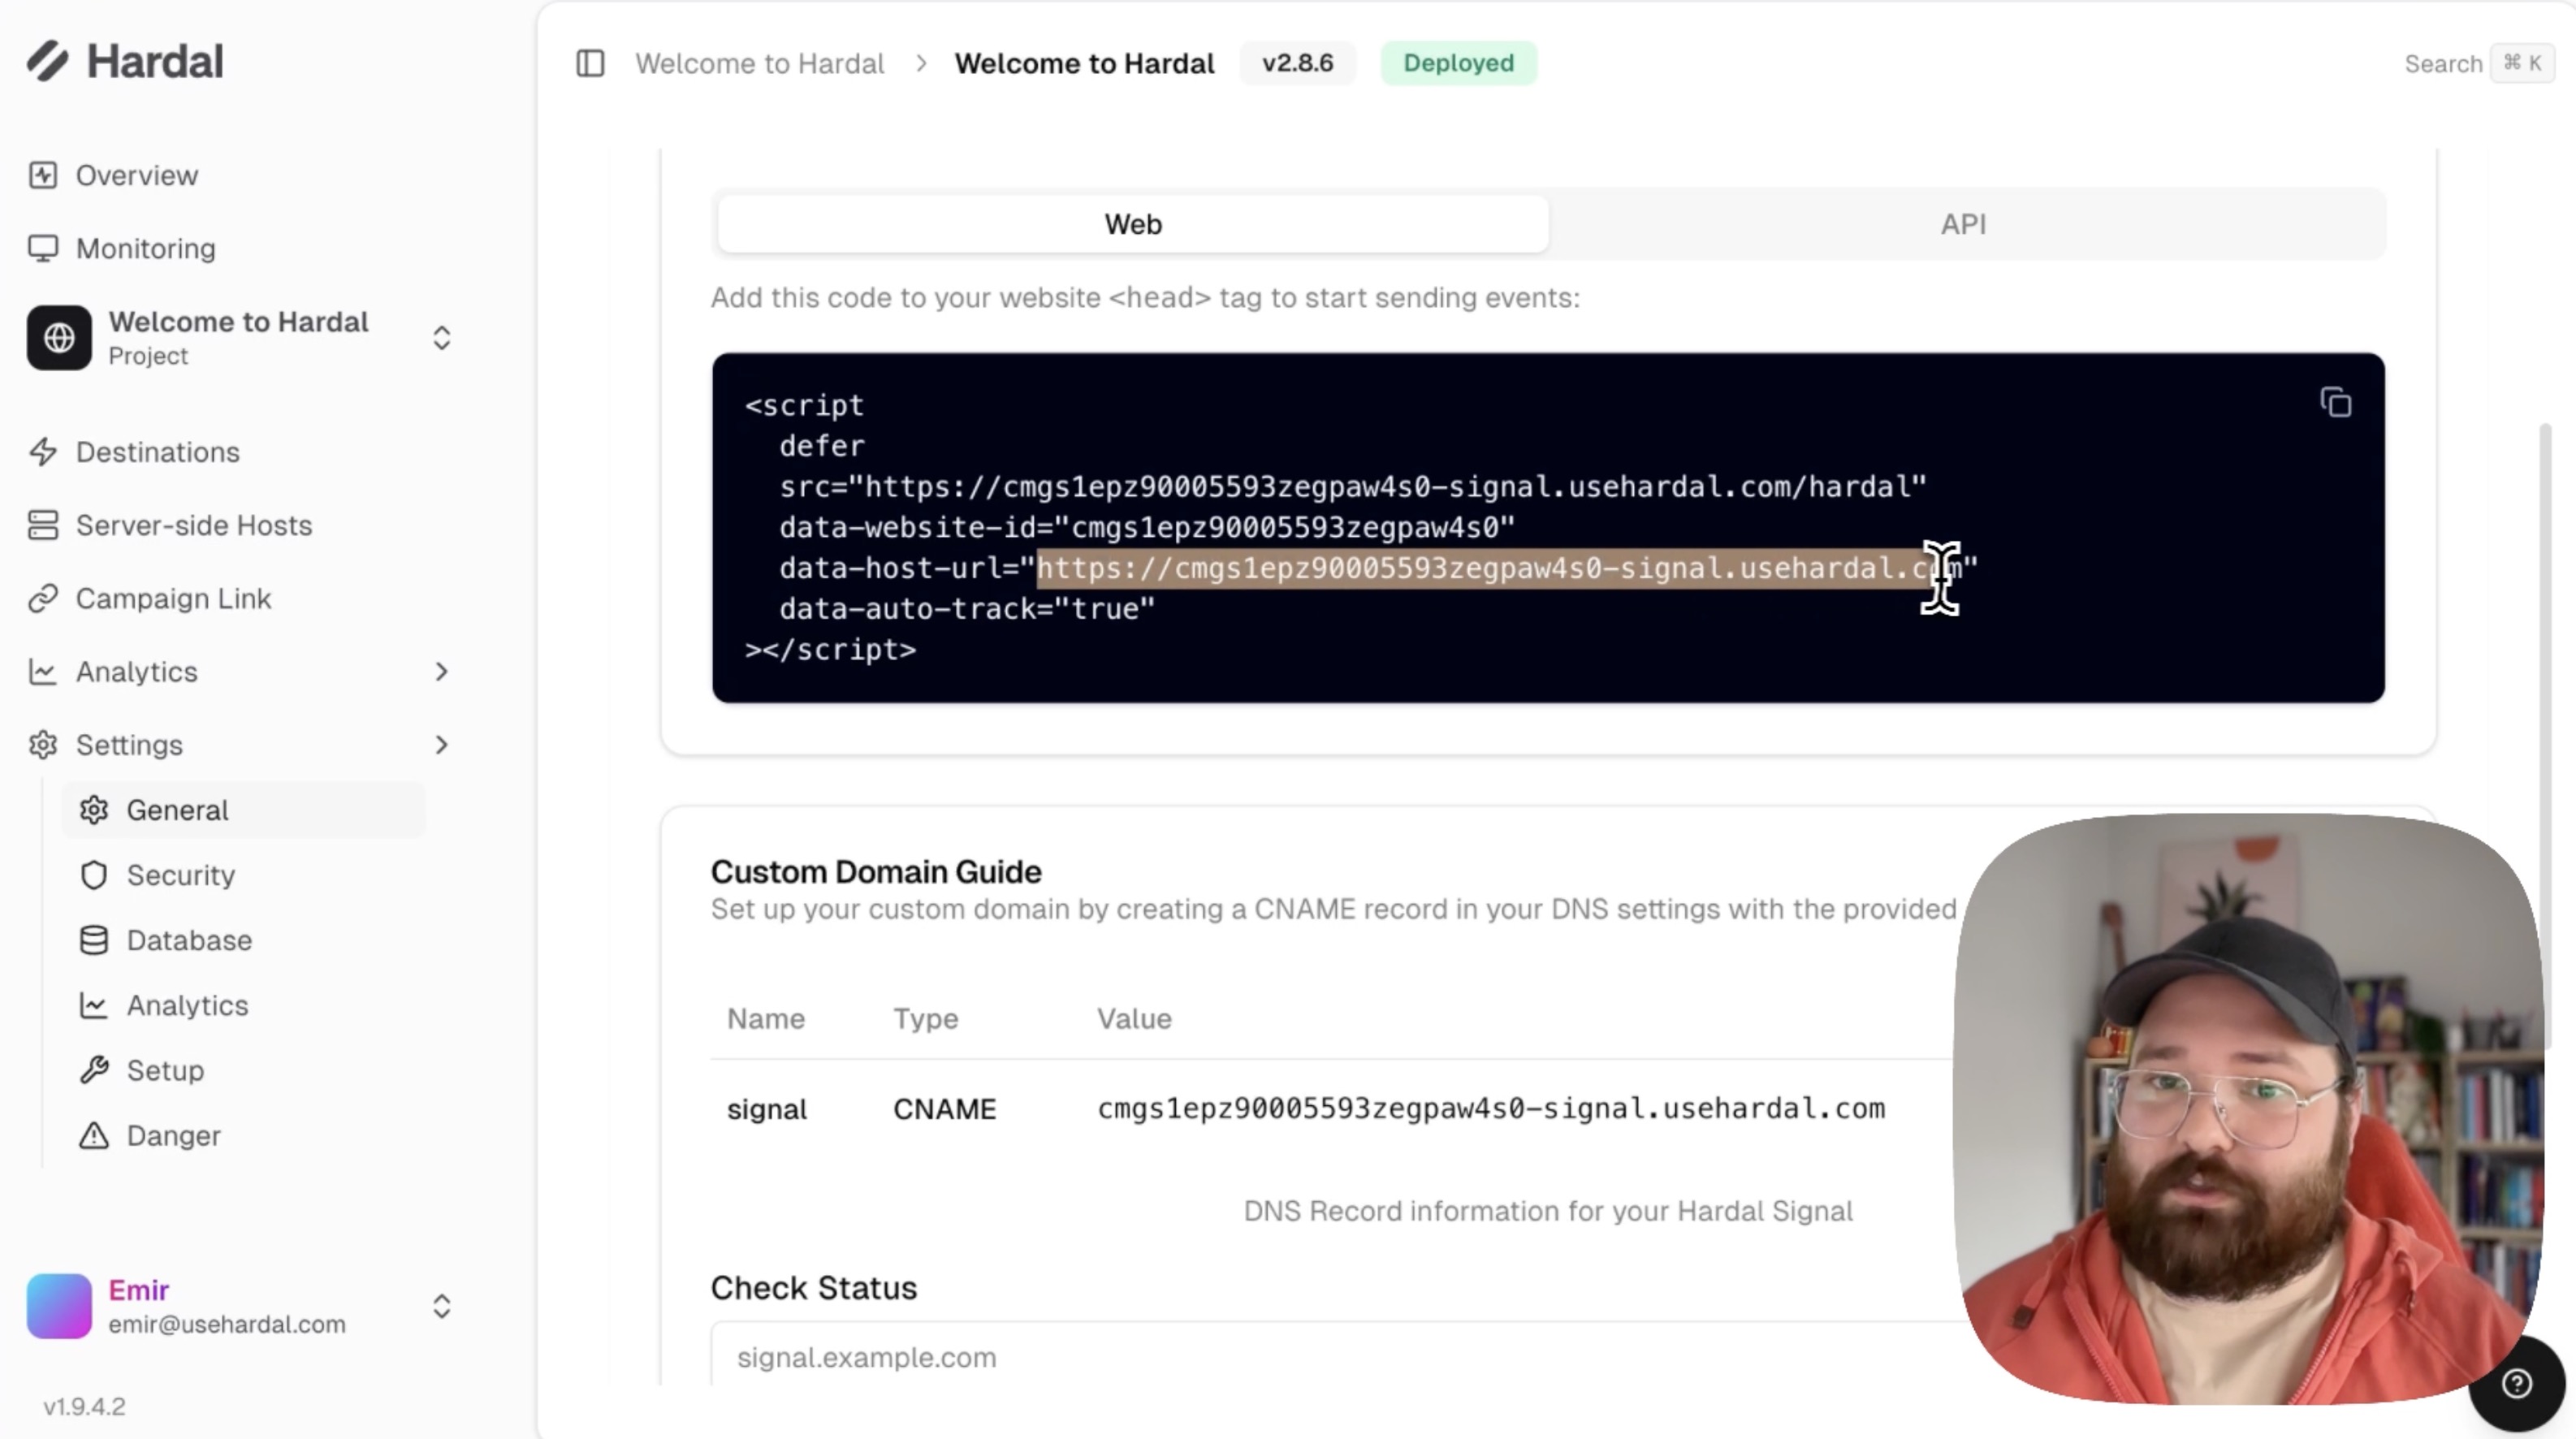
Important: Make sure to update your website with the new script to take advantage of first-party tracking.
If you're using Google Tag Manager, update the Hardal tag with the new script code.
Step 5: Test Your Setup
To confirm everything is working:
- Visit your website
- Open browser Developer Tools (F12)
- Go to the Network tab
- Refresh the page
- Look for requests to your custom domain (e.g.,
analytics.yourwebsite.com)
If you see successful requests to your custom domain, the setup is complete and working correctly.
Your Hardal analytics now operates through your first-party domain, providing improved data collection and better resistance to tracking prevention measures.
For a more detailed walkthrough, check out our step-by-step guide. How to Set Up First-Party Domain for Hardal