Destinations allow you to send your analytics data to any platform that supports network requests and API connections. This guide shows you how to set up both custom and template-based destinations.
Accessing Destinations
Navigate to your Hardal dashboard, select your signal, and click Destinations in the left menu.
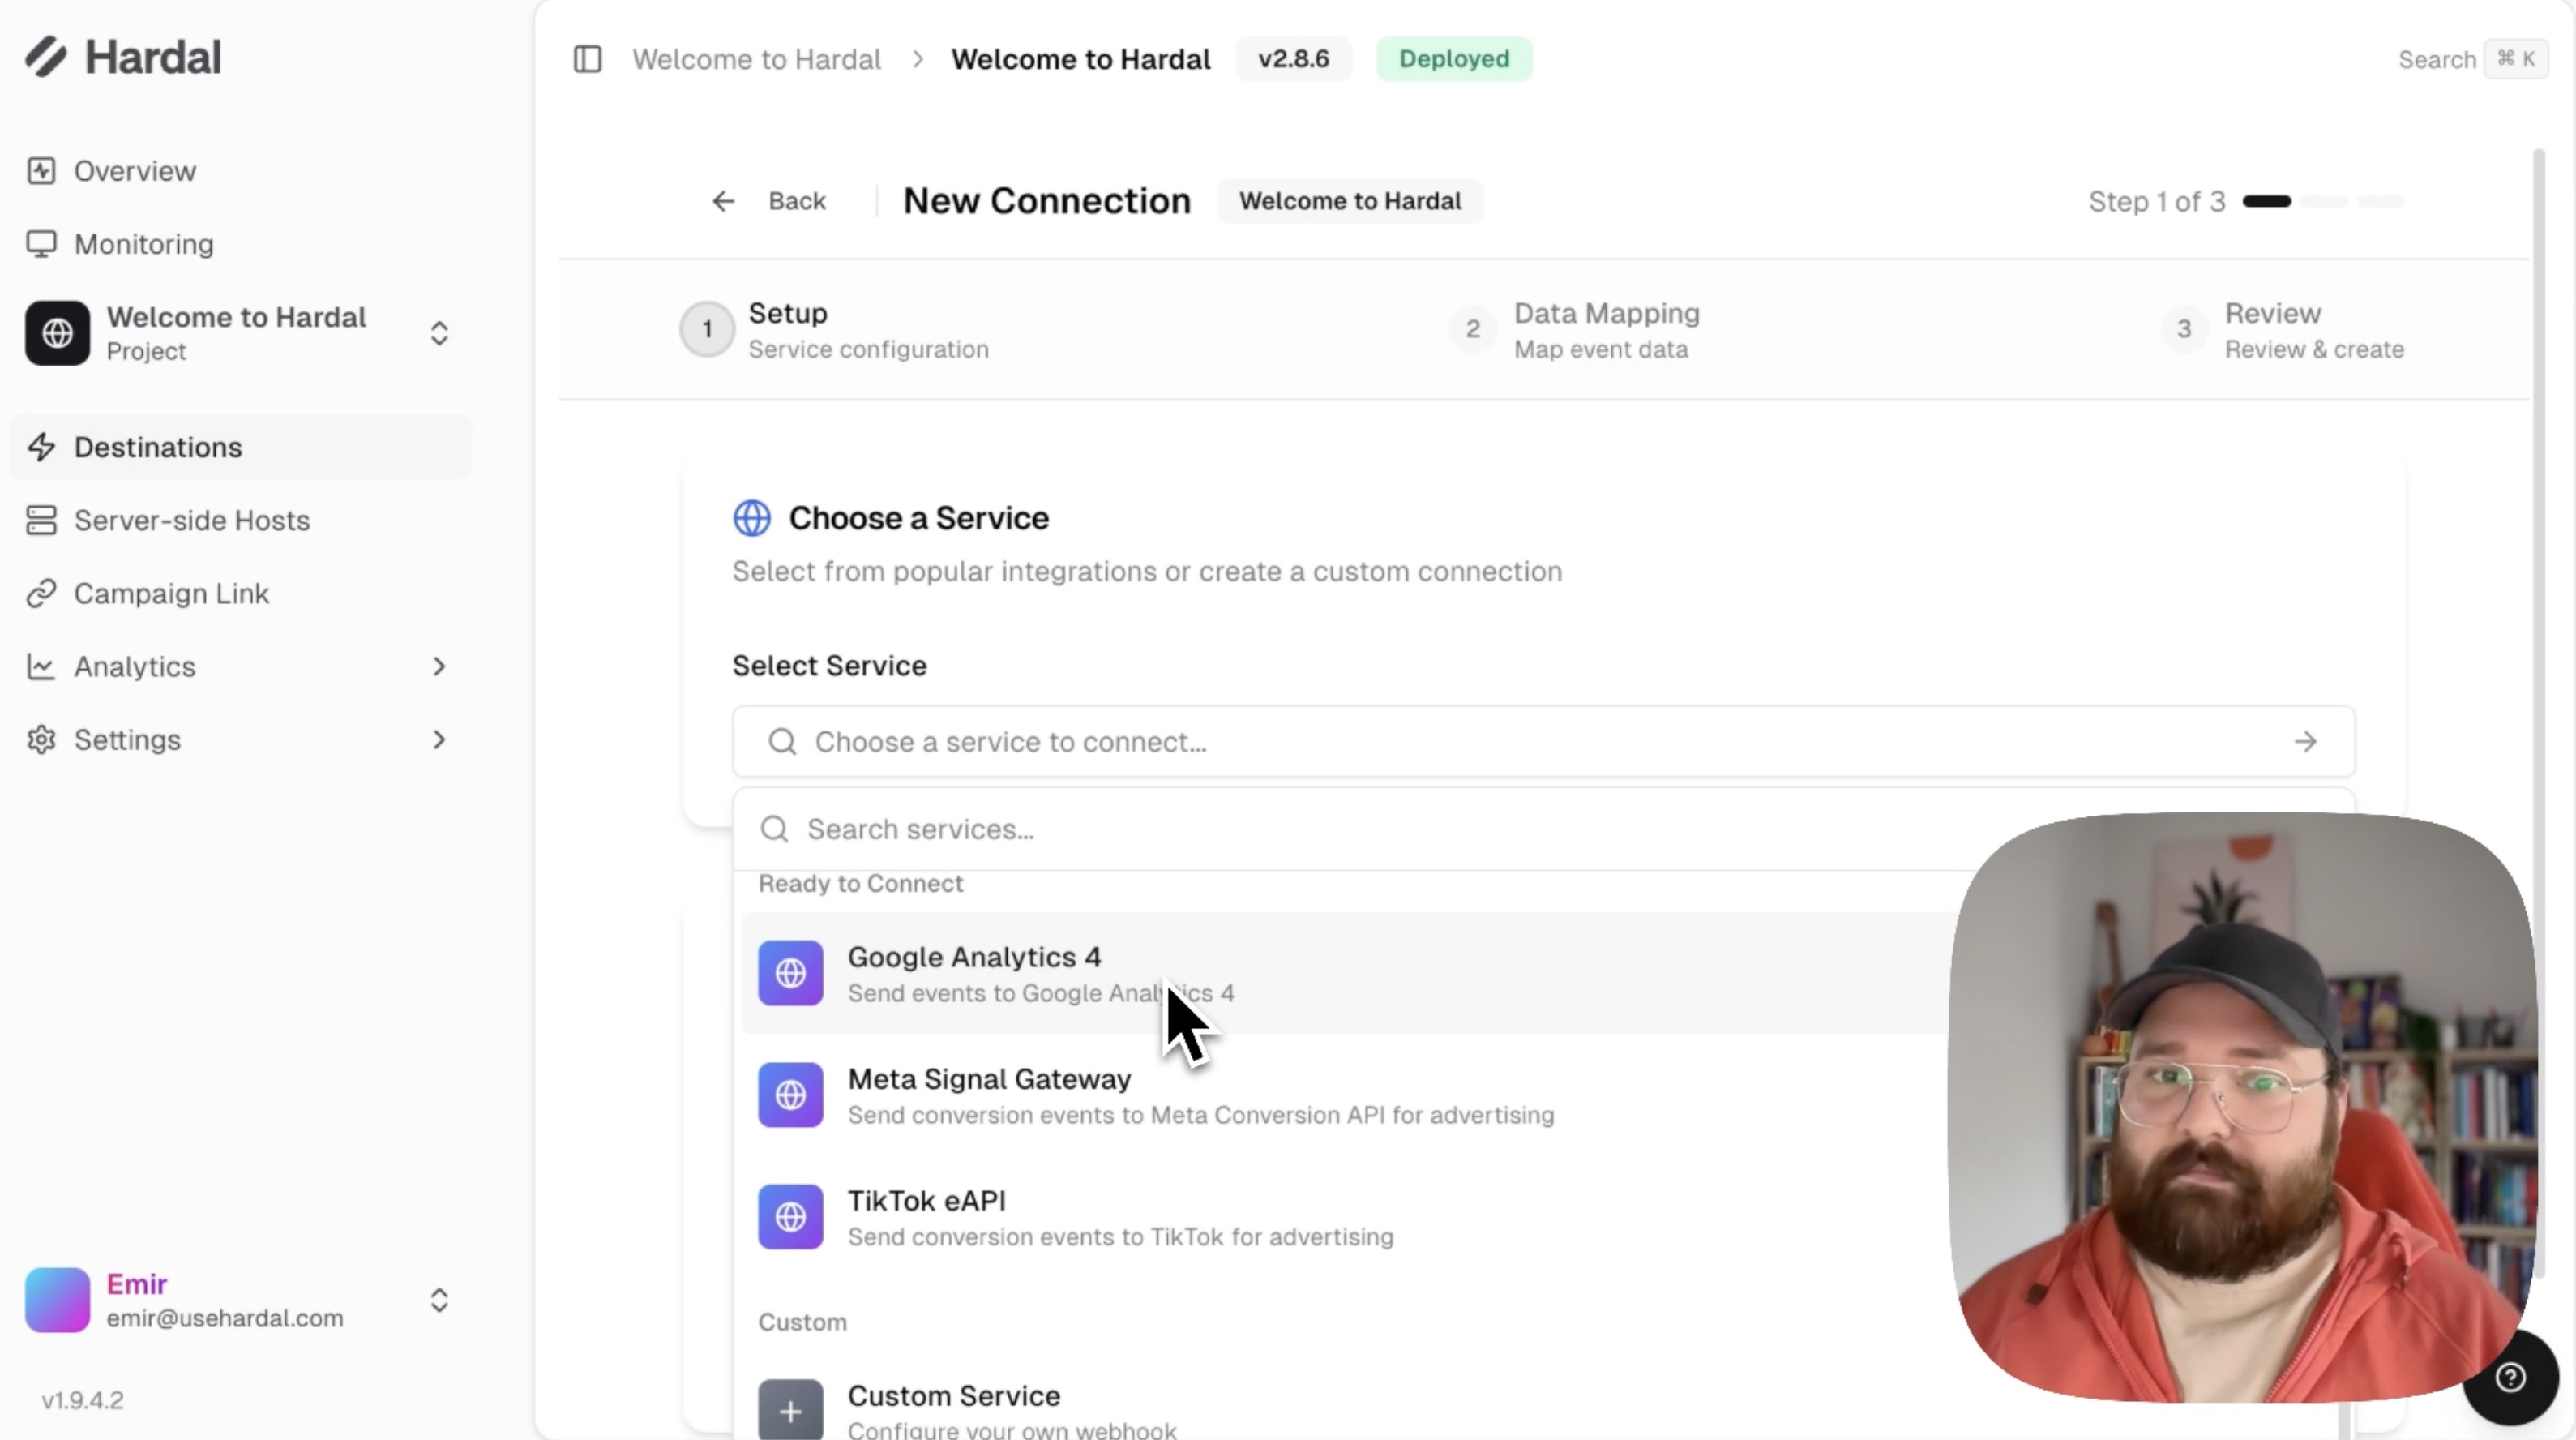
Creating a Custom Destination
To create a new destination:
- Scroll down and click Connect New Service
- Choose between ready-made templates or create a custom connection
- For this guide, we'll create a custom destination
Step 1: Basic Configuration
Configure your endpoint:
- Name: Give your destination a descriptive name
- URL: Enter your endpoint URL (e.g.,
myservice.com/api) - Method: Choose between POST or GET request
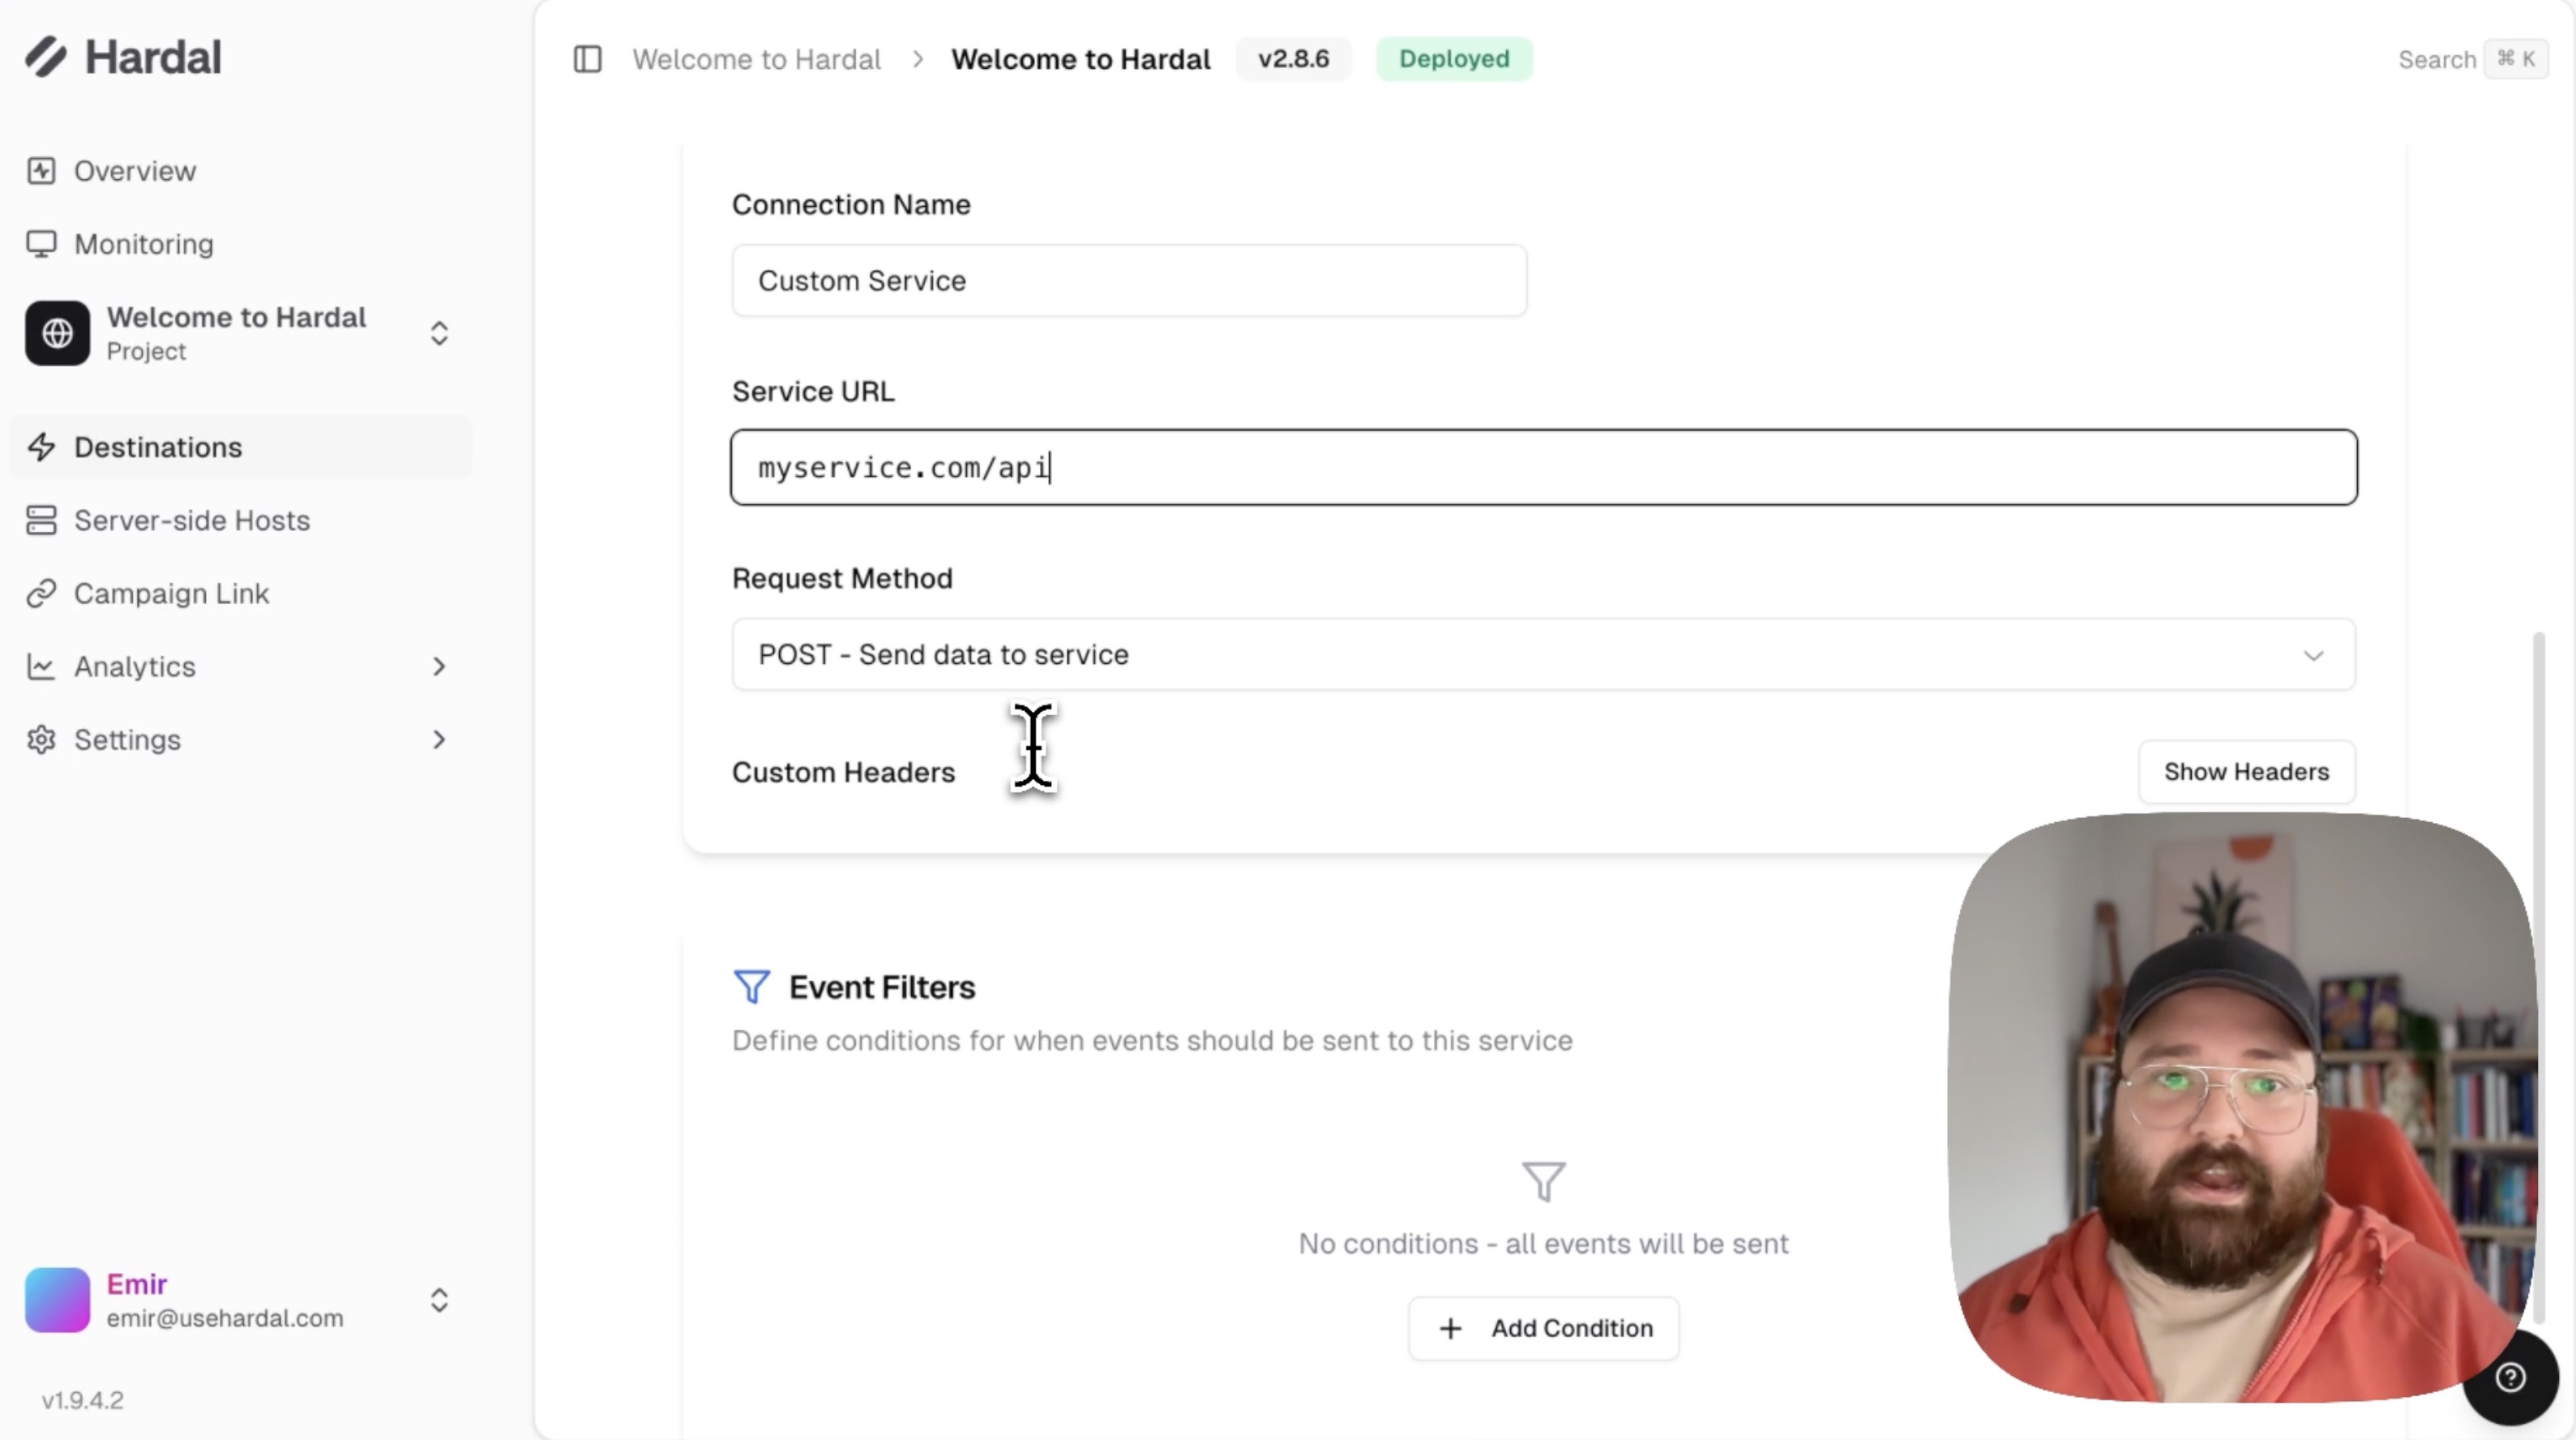
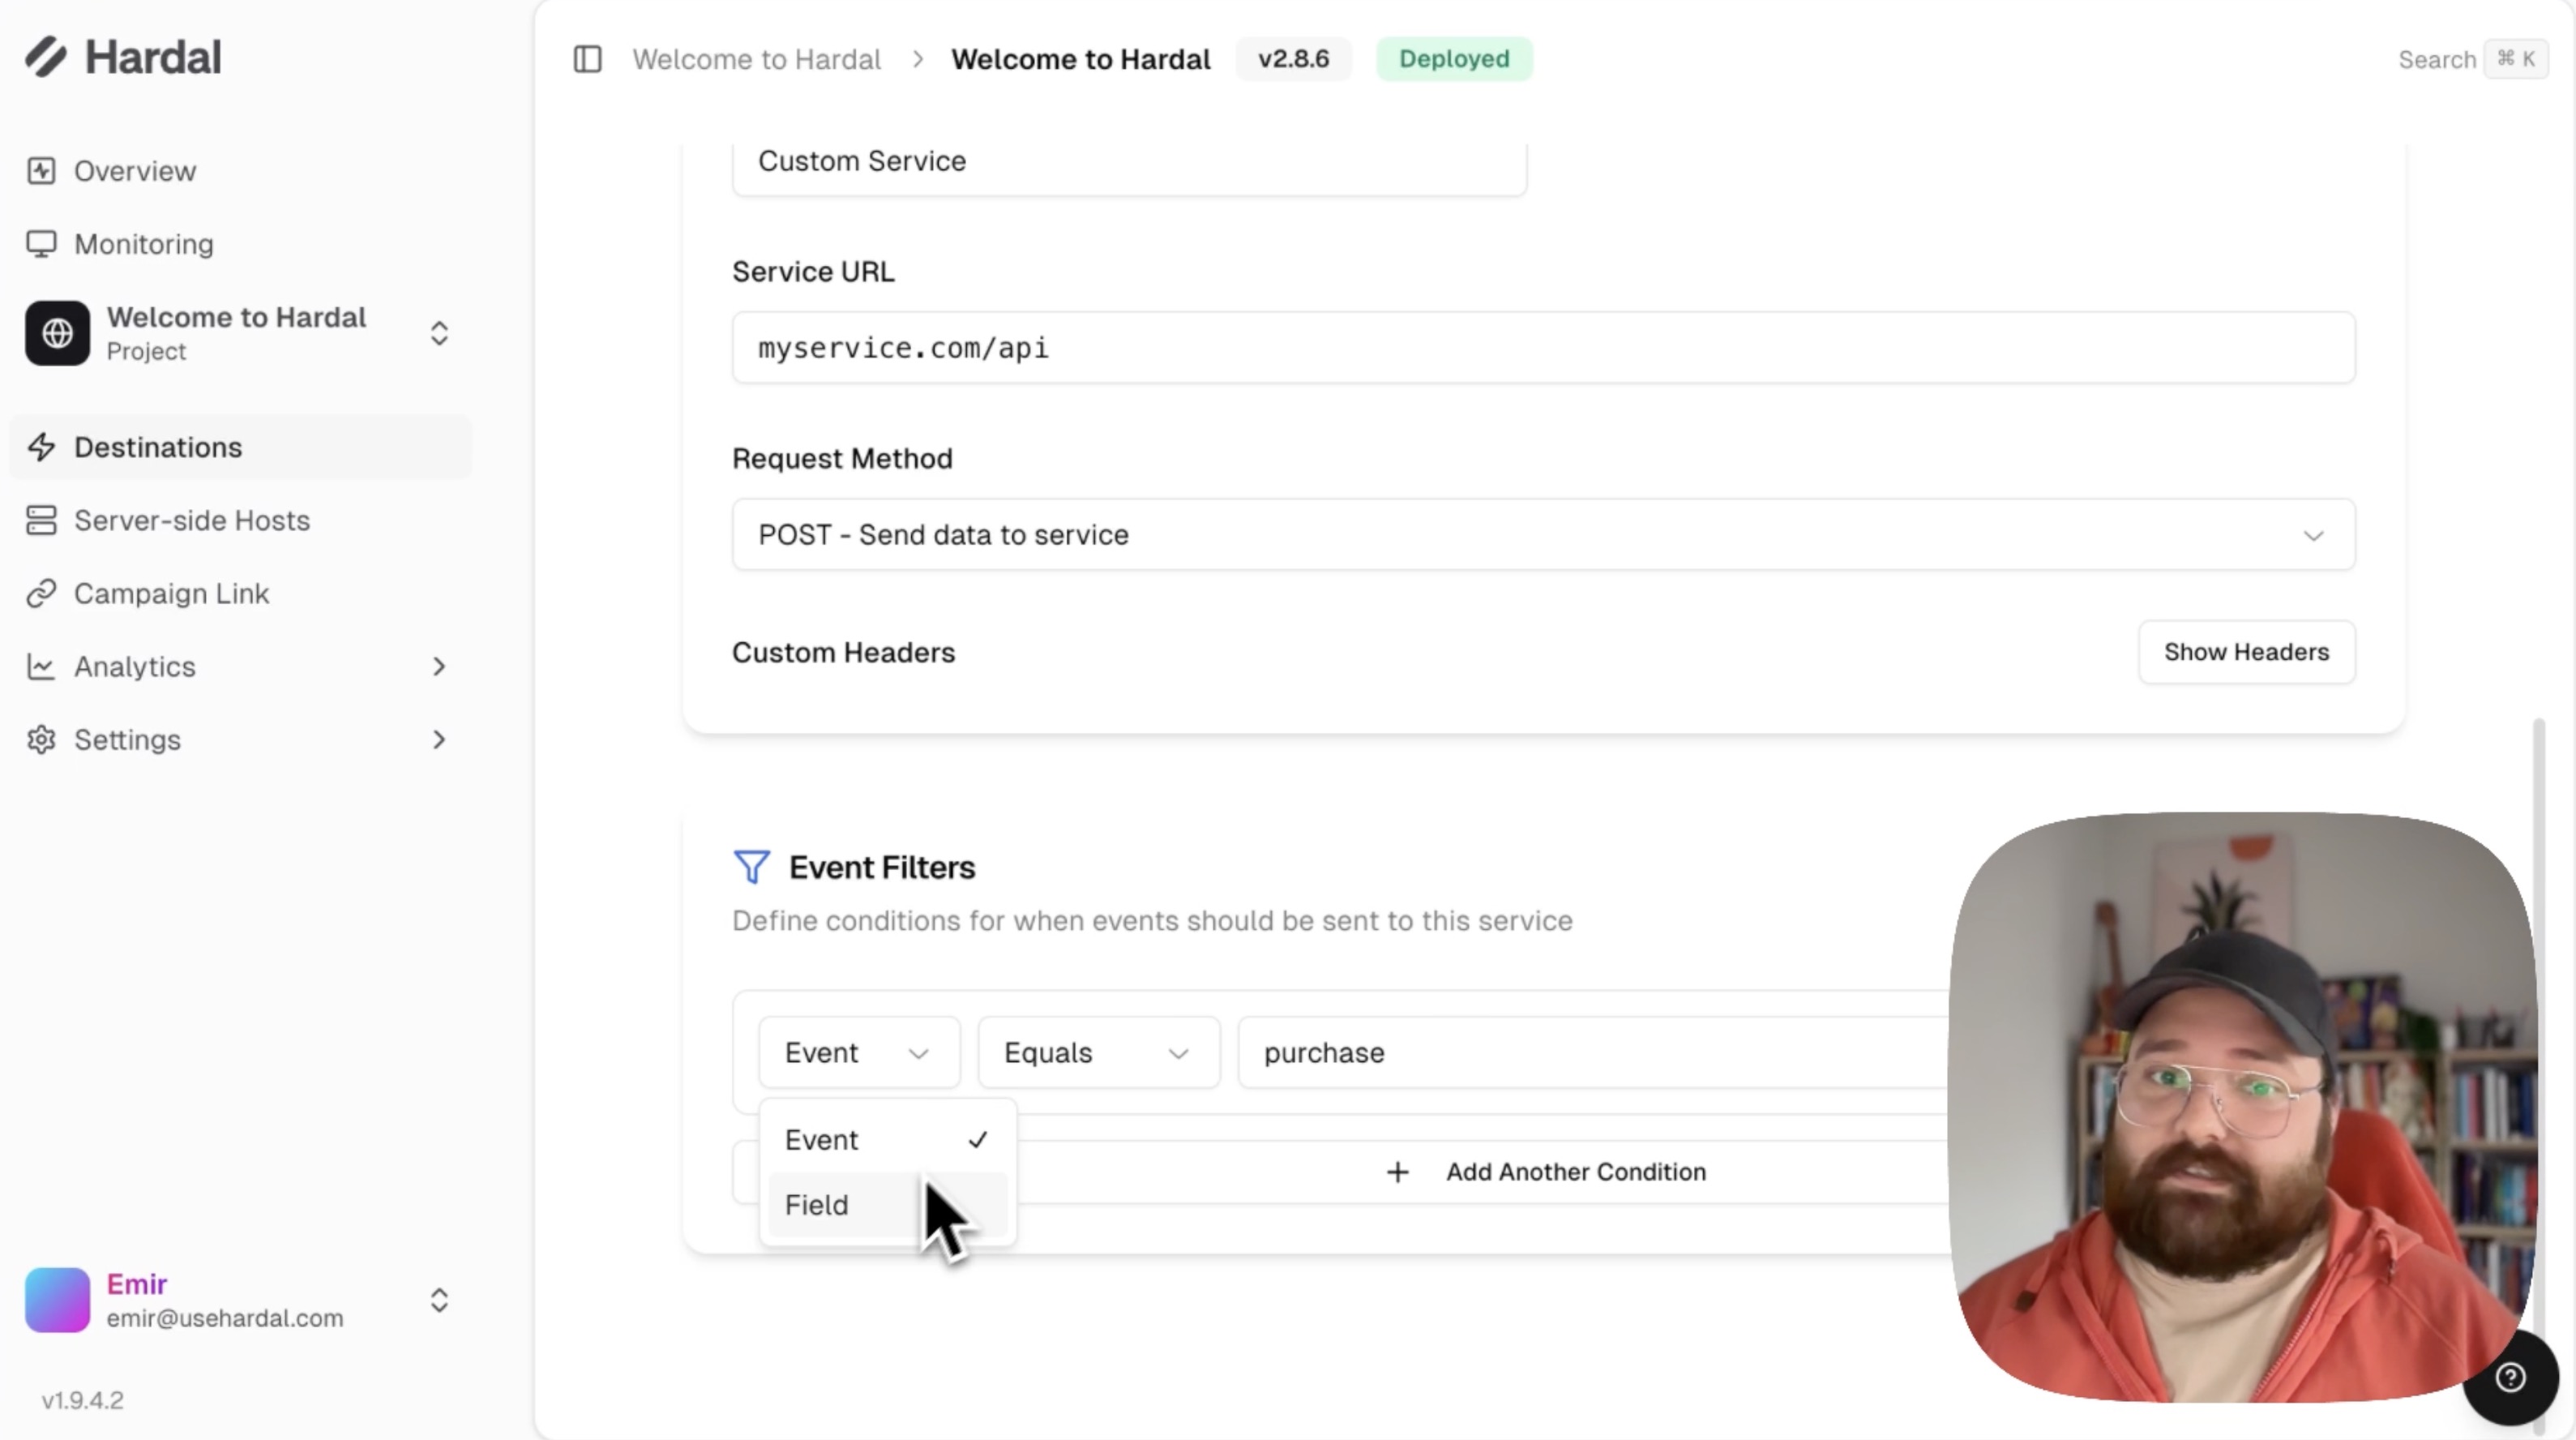
Step 2: Set Up Filters
Filters determine when data is sent to your endpoint. You can filter by:
Event Name: Send data only for specific events (e.g., "purchase") Field Value: Filter based on specific field values in your events
Example: To send only purchase events, set:
- Filter type: Event Name
- Condition: Equals
- Value: "purchase"
Click Continue to proceed to data mapping.
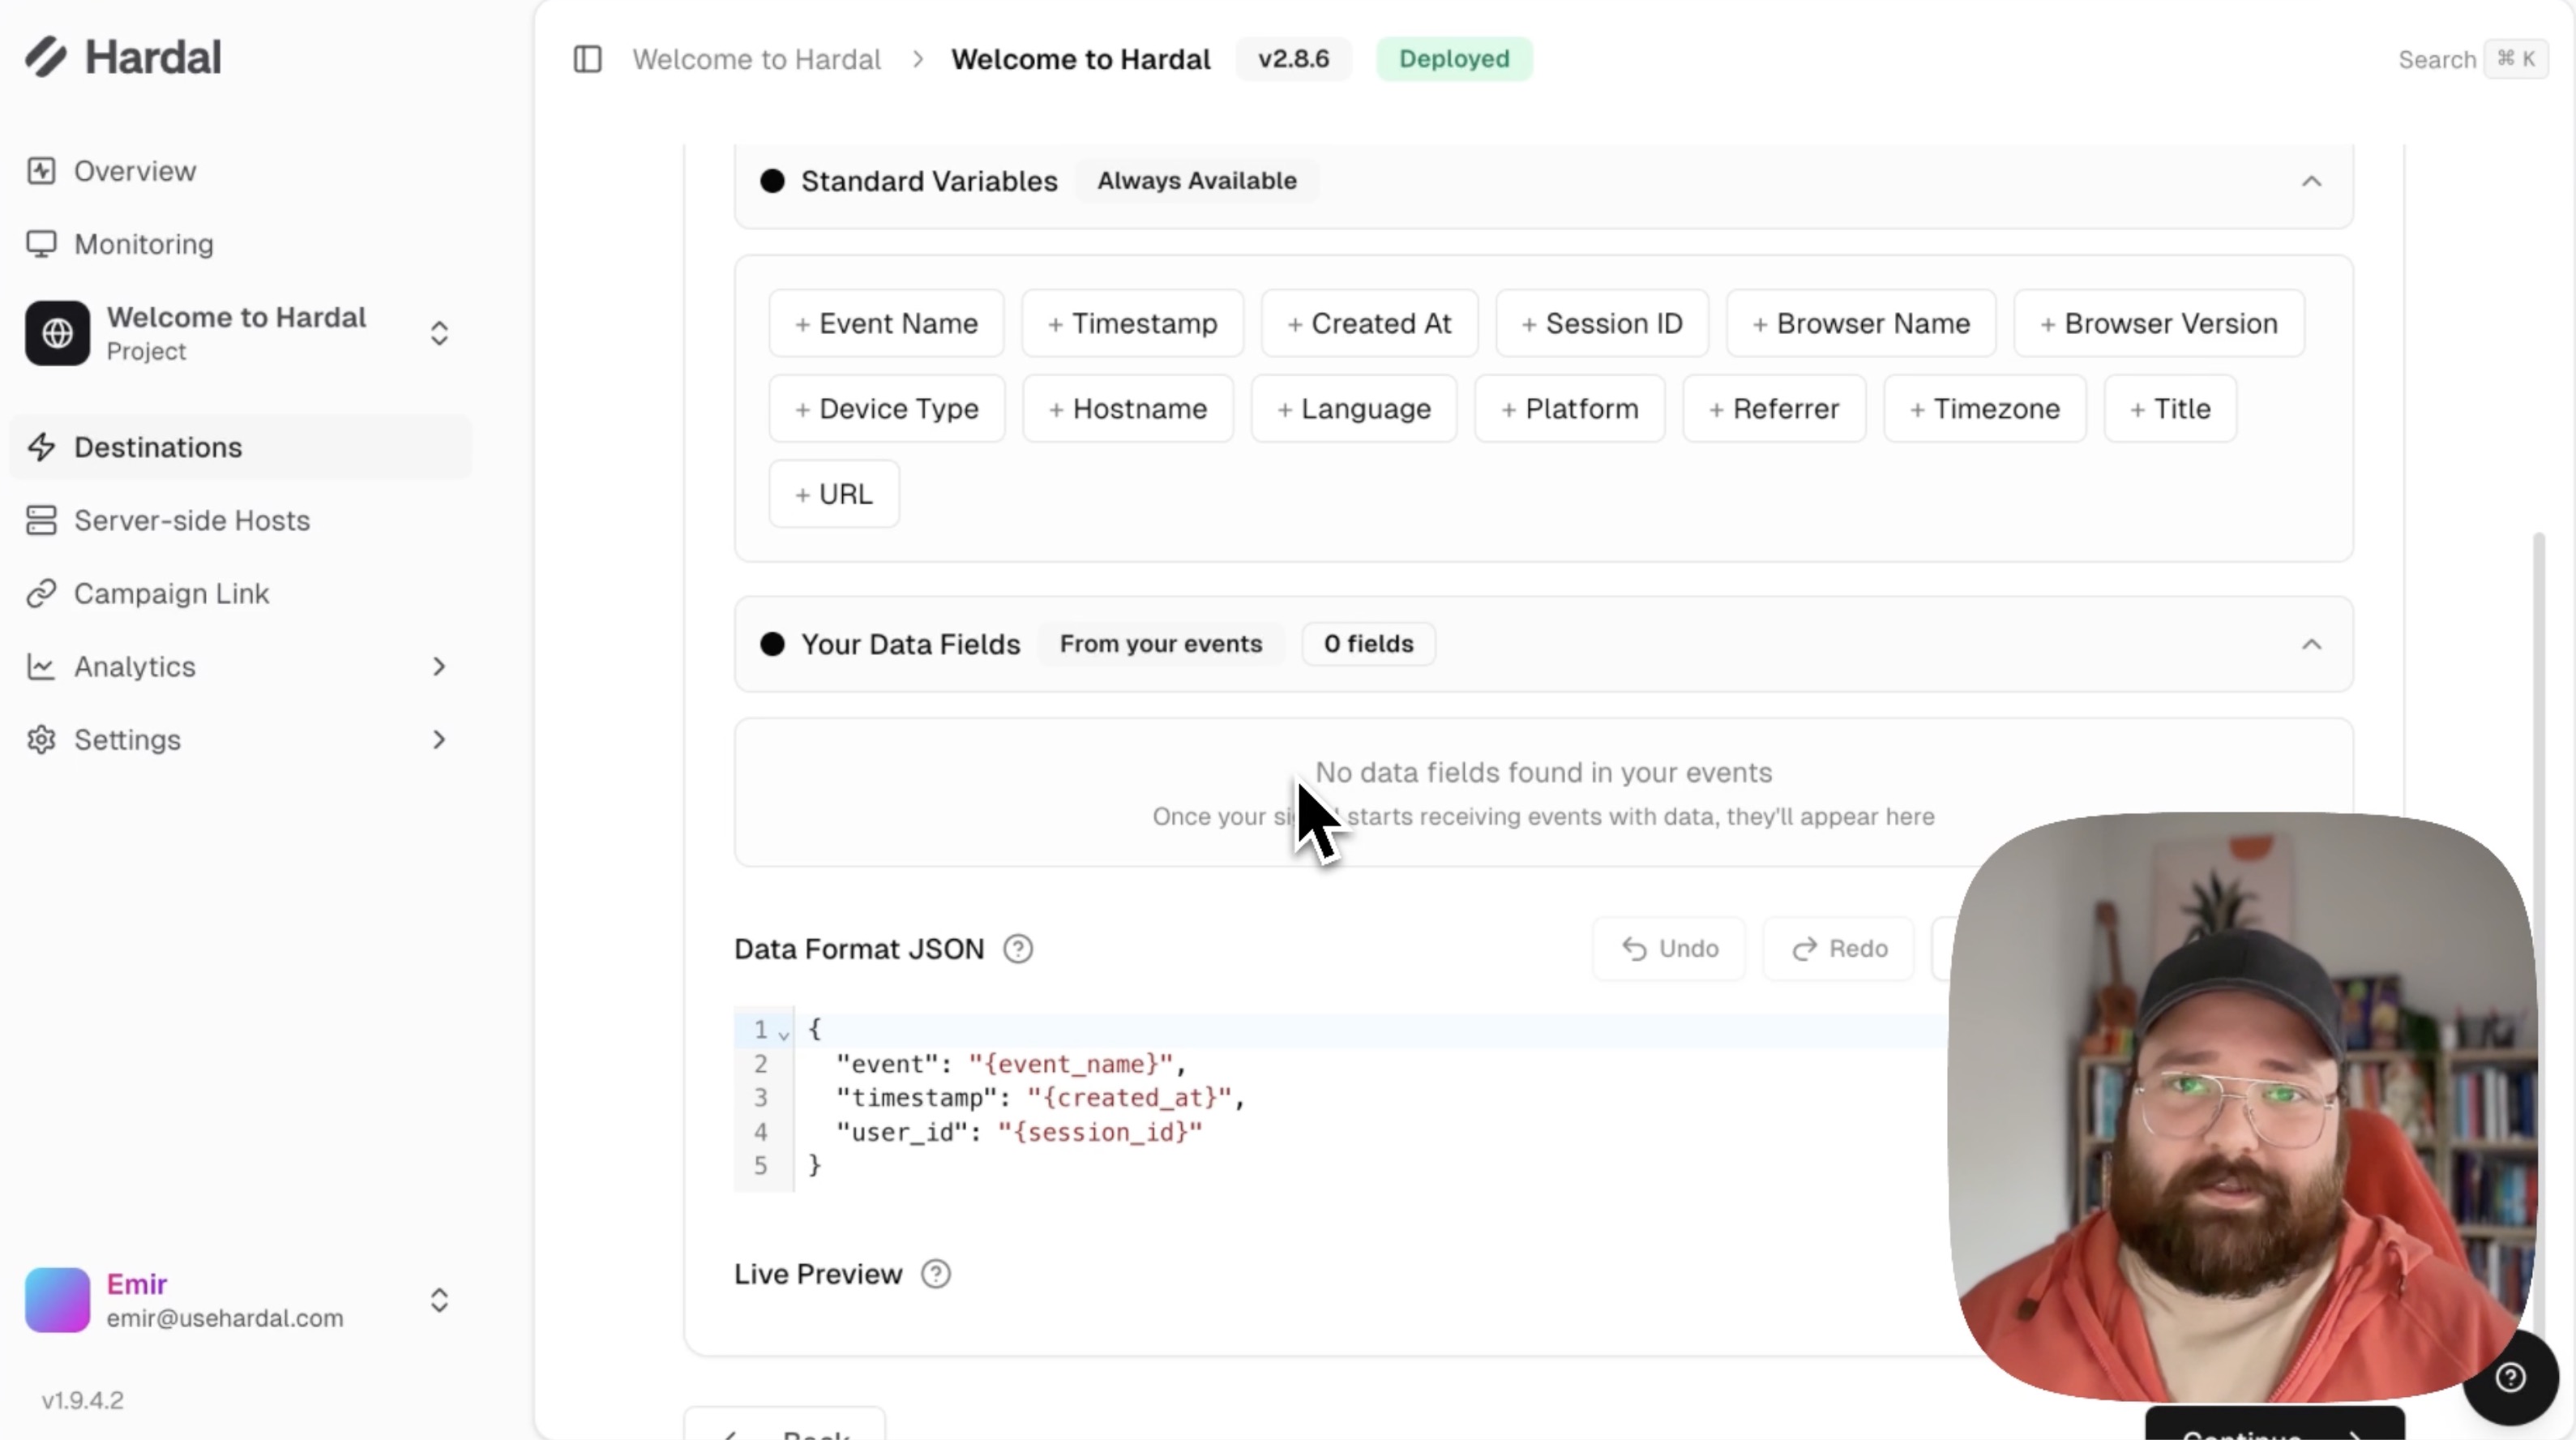
Step 3: Map Your Data
The mapping page shows:
- Default Variables: Data collected by Hardal automatically
- Your Data Fields: Custom data you send to Hardal
Create a custom JSON format for your request:
{
  "event": "{{event_name}}",
  "timestamp": "{{created_at}}",
  "user_id": "{{user_id}}",
  "another_field": "custom_value"
}
Click on variables to add them automatically to your JSON structure.
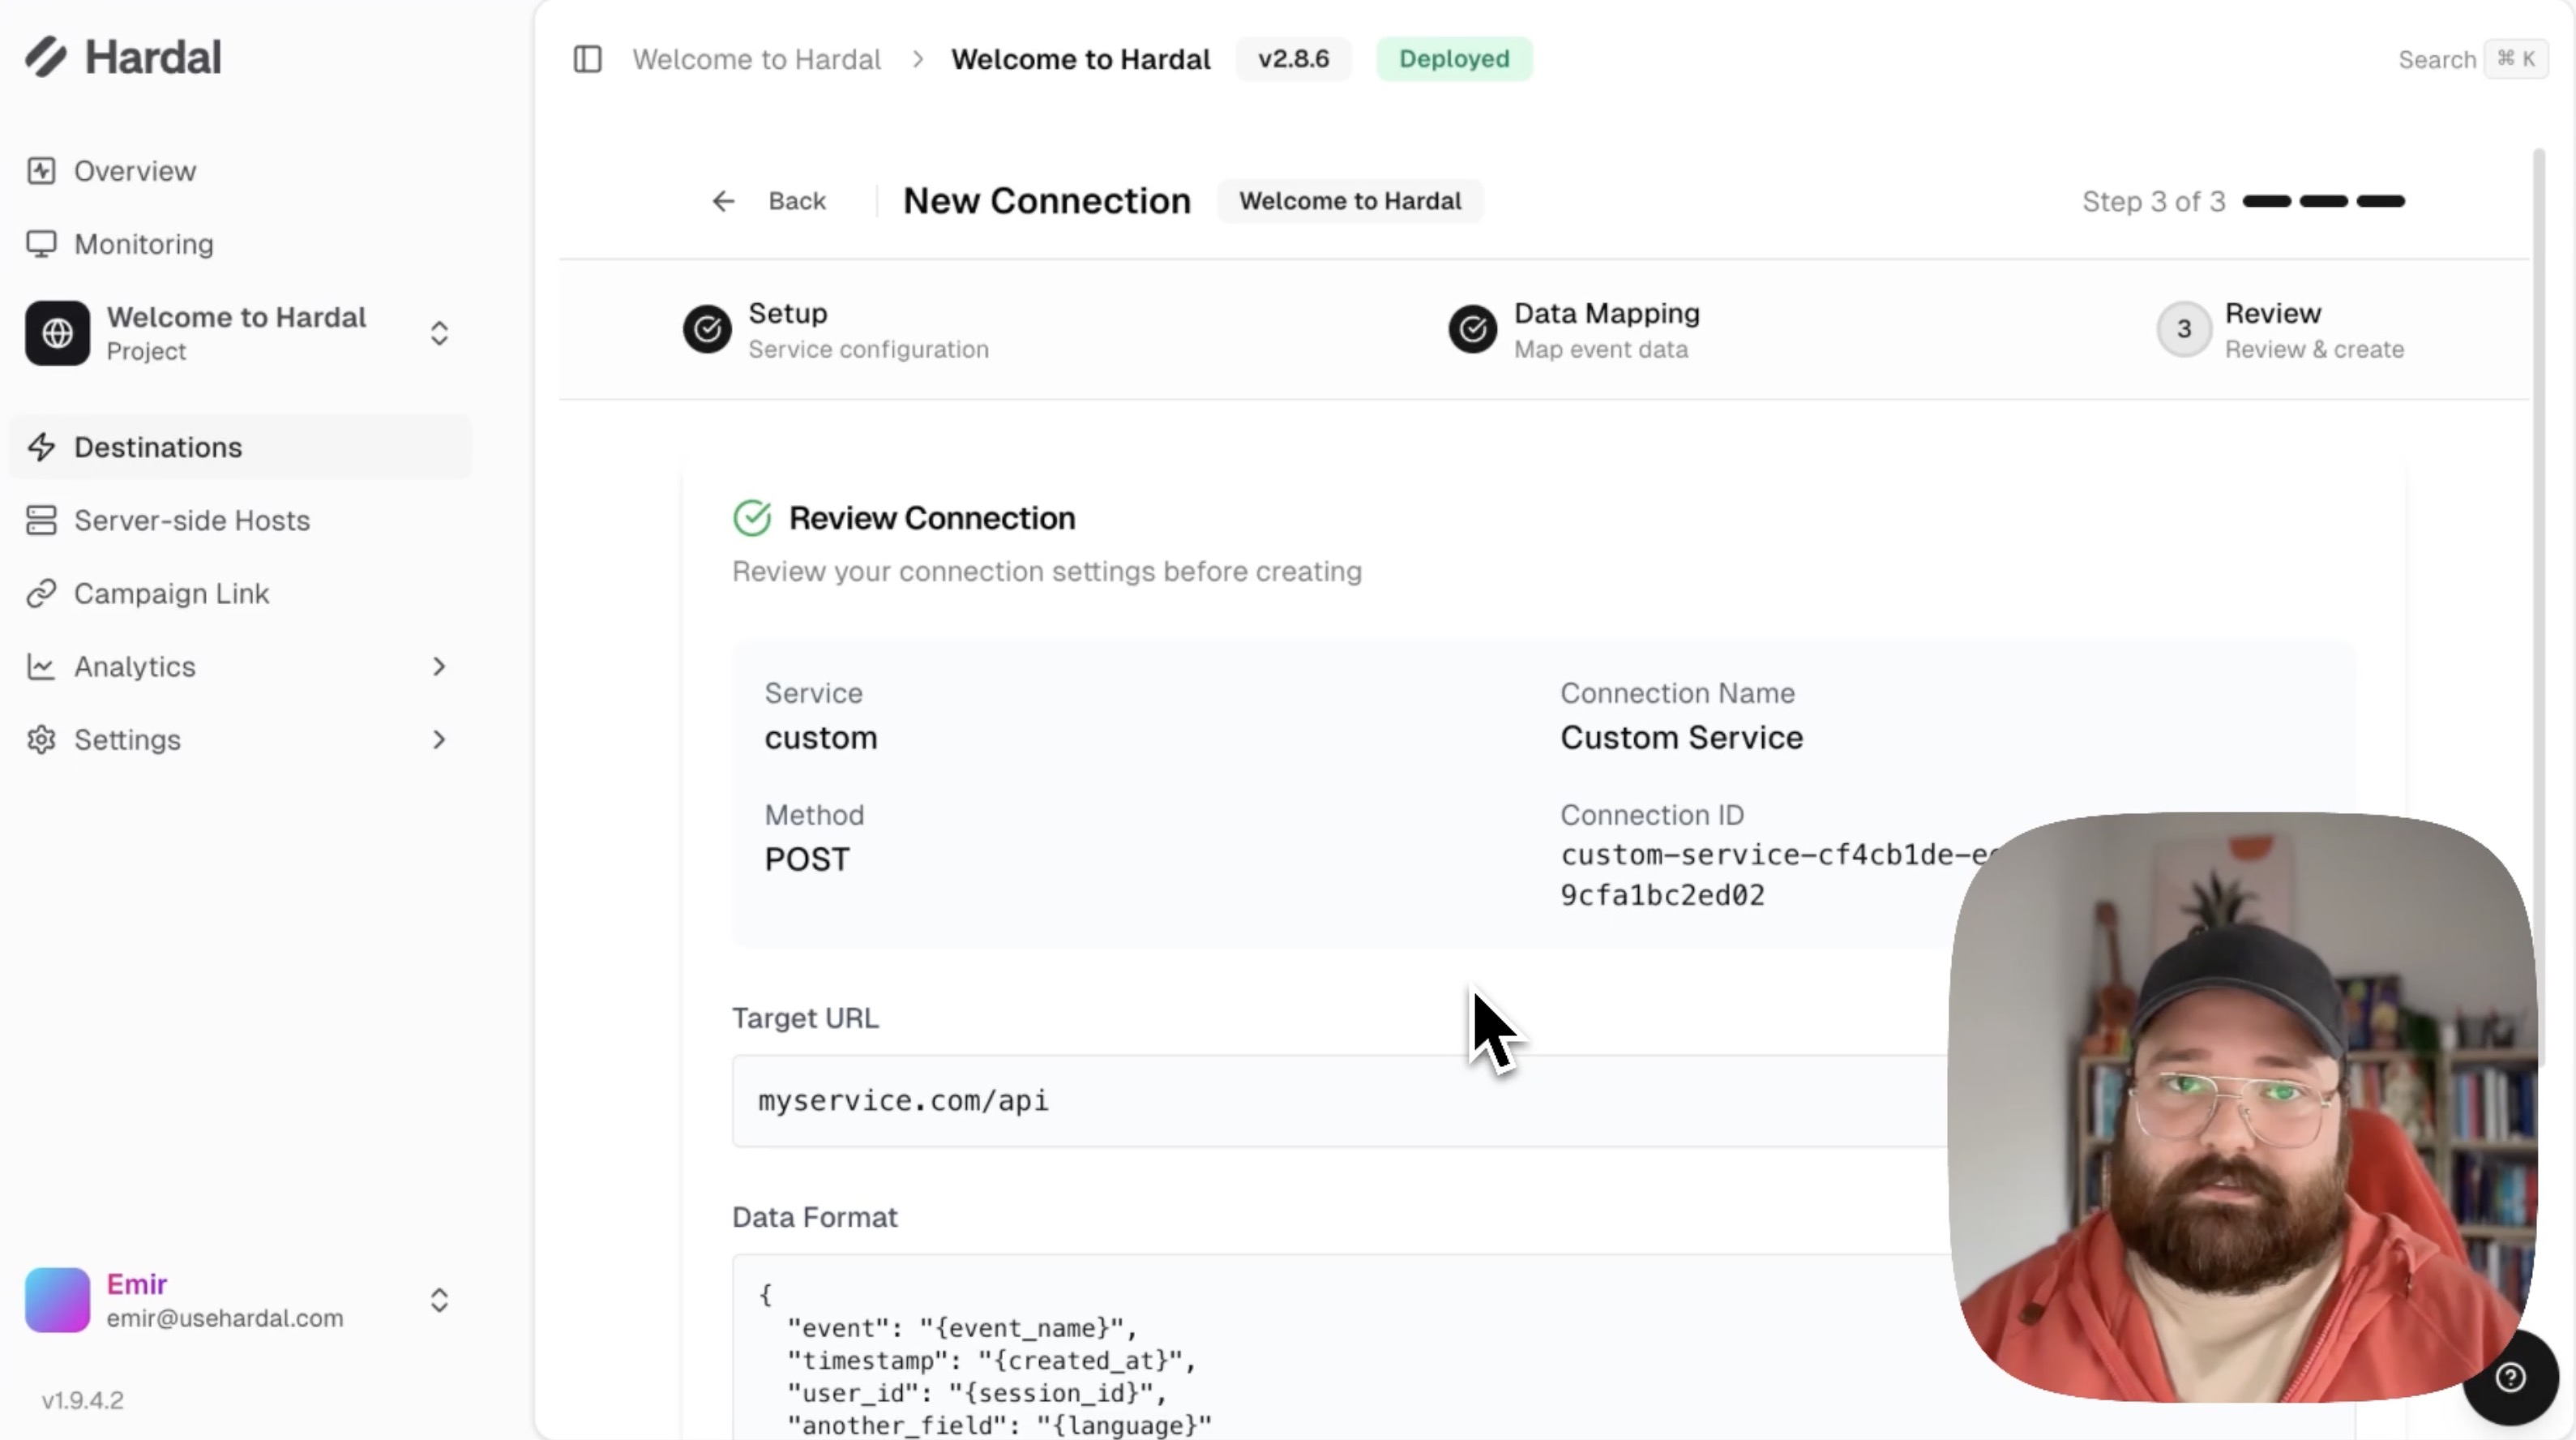
Step 4: Review and Create
The summary page shows:
- Your filtered condition
- The endpoint URL
- Example request format
This confirms: "Each time a purchase event is created on your website and received by Hardal, this endpoint will receive a request in this format."
Click Create Connection to finalize.
Managing Your Destinations
Back on the Destinations page, you'll see all your connected services. You can:
- View connection status
- Disable/enable connections
- Edit existing destinations
- Delete destinations
This feature enables you to integrate Hardal with any platform that accepts HTTP requests, expanding your analytics capabilities beyond the Hardal dashboard.
For a more detailed walkthrough, check out our step-by-step guide. Hardal Dashboard - Destinations